
How to Send Automated Slack Messages (Easiest Way 2024)
In this article, we will show you how to send automated Slack messages. Simply follow the process below.
How to Send Automated Slack Messages
Lido's SENDSLACK formula allows you to send Slack messages directly from your spreadsheet.
=SENDSLACK(<sender-credential>, “channel”, message, [status])
Section 1: Recurring Slack Automated Messages
(if you want to send automated slack messages when conditions in your spreadsheet are met, go to Section 2. If you want to send automated slack messages every time a new row is added to your spreadsheet, go to Section 3)
Step 1: Prepare your Google Sheet Data
For this example, we have a Google Spreadsheet that has some summary KPI data in some specific cells.
It is required that you have your data in a tabular format (no blank rows or blank columns separating your data).

Step 2: Connect your Google Sheet to Lido
We will use Lido, a new spreadsheet built to automate repetitive tasks, to connect to your Google Sheet and send automated slack messages. You can create a free account here: http://www.lido.app/go/signup
Step 2.a: From the Lido Files page, click "New File"

Step 2.b: Click Connect Data and select Google Sheets.

Press connect data

Press Google Sheets
Next, paste in your Google Sheet URL. If it's your first time connecting a Google Sheet to Lido, you'll need to authenticate into a Google account that has access to the Google Sheet you're trying to connect to.
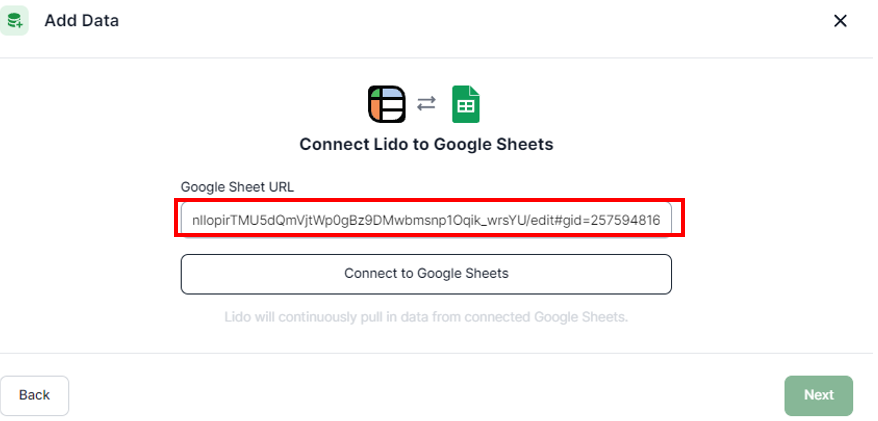
Paste your Google Sheet URL
After pasting the URL, click Connect with Google Sheets. You will get a message saying 'Successfully connected to Google Sheets’. Click Next.

Press ‘Connect to Google Sheets’. Then press ‘Next’.
Step 2.C: Select the specific range of KPI data in your spreadsheet.
For this example, we'll specify B4 through F5 so we grab just our KPI data, but include our header row as well. If your headers happen to be the top row of the sheet, you may not need to do this. Look at the Preview to make sure the correct data is showing.

Specify the cell range that includes your column headers and data
Click Add Data.
Your Lido spreadsheet should now have real-time, connected data from your Google Sheet. It will look like this:

Step 3: Add the SENDSLACK formula
We are now ready to create the formula to send Slack messages. The formula is:
=SENDSLACK(<sender-credential>, “channel”, message, status_cell)
Copy
Where:
Credential: A credential associated with your Slack workspace. You can enter this by typing in the first part of the SENDSLACK formula then pressing "Add Credential".
Channel: The name of the Slack channel you want to message. The channel name should be surrounded by quotes as so: “channel”.
Message: The Slack message you want to send. This can be a cell reference (like D2), a string (like “hello”), or a mix of cell references and strings (like “Hello “&D2) - where D2 is someone’s name.
status_cell: This is optional. It’s the cell that gets updated with “success” when you have successfully sent the Slack message.
Step 3.1: Add Slack Credential
Start typing the SENDSLACK formula in a blank cell. The first argument of the formula is your Slack credential. Click "Add Credential" and follow the prompt. This will give Lido the permission to send Slack messages on your behalf.

Add a Slack credential so Lido can send Slack messages on your behalf. Press ‘Add Credential’.
After pressing ‘Add Credential’ a new tab will appear, showing Lido is requesting permission to connect to your Slack workspace of choice. Click Allow:

Step 3.2: Add the Slack Channel name
Enclose this in double quotes. If you want to post to the #product channel, it would look like:
```=SENDSLACK(<sender-credential>,"product", message, status_cell)```
Step 3.3: Add the Slack message
Add the message that you would like to send through Slack. This can be a string such as "hello!", a cell reference such as C7, or any spreadsheet formula.
For our example, we will send a Slack message with line breaks within the message (on your keyboard press Option + Enter on Mac or Alt + Enter on a PC for line breaks):

Formula with line breaks to format a Slack message in the SENDSLACK formula.
In this example, the Slack message will say and *do the following*:
Daily KPI
Today’s Signups: *pulls in the real-time Google Sheet data in cell A2*
Conversion: *pulls in the real-time Google Sheet data in cell B2*
Support calls: *pulls in the real-time Google Sheet data in cell C2*
Conversion Rate: *pulls in the real-time Google Sheet data in cell D2*
The actual Slack message will look like this given the current, real-time Google Sheet data we are pulling in to Lido
Today’s Signups: 27
Conversion: 13
Support calls: 12
Conversion Rate: 48.14%
Step 4: Send a Test Slack message
If you haven't already sent a Slack message test, hover over the cell holding the SENDSLACK formula, right click on the cell or click on the 3 dots of the cell, and select "Run Action" (see the GIF example below). A Slack message will be sent to the channel you specify.

Click “Run Action” to test SENDSLACK()
When the action runs successfully, you will get a notification in your Slack channel (see example image below)!

Step 5: The fun part….send automated Slack messages from your Google Sheet
Now that you know how to manually send a Slack message from your Google Sheet, if you want to send automated slack messages - do the following:
1. Right-click on the cell that has SENDSLACK in it and select "Add cell automation"
2. Choose the interval that makes sense and click Save.
- Note: At the interval you choose the following will happen:
- Lido will pull the latest data from Google Sheets (in other words, the Lido spreadsheet cell values will depict the current state of your Google Sheet)
- Lido will run the SENDSLACK formula and a message will be sent to your Slack channel of choice (with the real-time data from your connected Google Sheet if included in your message!)

That's it!
Section 2: Automated Slack messages based on conditions in your data being met
Step 1: Prepare your Google Sheet Data
Open the Google sheet that you want to send a Slack message from when a condition in your Google Sheet is met (like if a cell equals a certain value). Make sure the data is tabular (no blank rows or blank columns separating your data).
Click share in the top right hand corner. Click copy Link. We will paste this link into Lido in a later step to import your spreadsheet data.

Step 2: Connect your Google Sheet to Lido
We will use Lido, a new spreadsheet built to automate repetitive tasks, to connect to your Google Sheet and send automated Slack messages. You can create a free account here: http://www.lido.app/go/signup
Step 2.a: From the Lido Files page, click "New File"
Step 2.b: Click Connect Data and select Google Sheets.
Press connect data
Press Google Sheets
Next, paste in your Google Sheet URL. If it's your first time connecting a Google Sheet to Lido, you'll need to authenticate into a Google account that has access to the Google Sheet you're trying to connect to.
Paste your Google Sheet URL
After pasting the URL, click Connect with Google Sheets. You will get a message saying 'Successfully connected to Google Sheets’. Click Next.
Select the column headers you want to import and then click Add Data. By default, all the columns are selected by Lido. For our example, we need all the columns, so we simply click Add Data.

Well done! Your Google Sheet has now been imported to Lido.

Step 3: Add Columns for the SENDSLACK formula, the Slack message, and a message status
We need to create columns for the following:
Step 3.a: Create a new Computed Column called Action. This will hold the SENDSLACK formula.
To create a Computed Column, hover over the last Google Sheet data column in your Lido file, and you'll see a + sign. Choose "Computed Column" and it will add an empty column to the right of the table. Double click on the header cell, and rename it Action.

Step 3.b: Create a new Linked Column called Action Done? This column will store a note whether or not a message has been sent.
Create a Linked Column the same way you created a Computed Column, but choose "Linked Column" instead. You will need to choose an ID column, and this should be another column in your data where the values are guaranteed to be unique. Columns with timestamps, IDs, or email addresses are often good choices for unique values.
Step 3.c: Create another Computed Column to store the personalized message to send. Name this Message.
Your file should end up looking like this:

Step 4: Create the Slack Message
Column E will be our ‘Message’ column, containing the slack messages we want to send when our condition is met (keep reading for further explanation!). We'll create a personalized message that pulls in the person's name. In this example, we will input the below formula in cell E2 to create the message:
```=A2&" has completed the task."```
What the formula above does is read the value in cell A2, then combine it with the string “ has completed the task”. For example, if the value of A2 is John, the corresponding message is: John has completed the task.
Insert the formula in cell E2, then press Enter.

Lido will automatically apply the formula to all the below rows (with the correct cell references), generating the personalized message for each row!

Step 5: Create the SENDSLACK formula
We are now ready to create the formula to send Slack messages. The formula is:
```=IF(AND(condition=TRUE, action_done<>"success"), SENDSLACK(<sender-credential>, “channel”, message, action_done cell))```
Where:
Condition: cell you want to scan if their value is equal to what would trigger an automated Slack message.
Credential: A credential associated with your Slack workspace. You can enter this by typing in the first part of the SENDSLACK formula then pressing "Add Credential".
- A new tab will appear, showing Lido is requesting permission to connect to your Slack workspace of choice. Click Allow:


Channel: The name of the Slack channel you want to message. The channel name should be surrounded by quotes as so: “channel”.
Message: The Slack message you want to send. This can be a cell reference (like A2), a string (like “hello”), or a mix of cell references and strings (like “Hello “&A2) - where A2 is someone’s name.
Action_done cell: This is optional. It’s the cell that gets updated with “success” when you have successfully sent the Slack message for a row. In this example, for row 2 this would be cell D2.
The SENDSLACK formula should be implemented in the row 2 cell of the ‘Action’ column. In this example, the formula will go in cell C2, and the full formula looks like this:
```=IF(AND(B2=TRUE, D2<>"success"), SENDSLACK(<sender-credential>, "channel", E2, D2))```
The formula will check the below conditions for whether a Slack message should be sent or not:
- Condition 1: Check column B (labeled Task Due) and see if a row’s value for that column = TRUE
- Condition 2: Check column D (labeled Action Done?) and see if a row’s value for that column does not equal (<>) “success” (i.e., the message has not been sent yet for that row)
If the above two conditions are both met, Lido will:
- Send the message stored in Column E (labeled Message) via Slack
- Write success to column D (labeled Action Done?) to mark that the message has been successfully sent via Slack for a row
- Hide the SENDSLACK formula in the Action column for the rows whose Slack messages were sent (i.e., where ‘Action Done?’ = “success”)
After adding the formula, press Enter. Lido will apply the formula to all the rows in the Action column.

Note: if row 3 is the only one marked TRUE for the Task Due column, then according to the formula, it is the only row that will show the SENDSLACK formula
Step 6: Send a Test Slack message
If you haven't tested SENDSLACK, hover over one of the rows that is ready for a Slack message to be sent - any row whose:
- Value for the Task Due column = TRUE
- Value for the Action Done? column does not equal “success”
Right click on or click on the three dots of the cell showing the SENDSLACK formula, and press Run Action in the pop-up menu (see the GIF below for an example):.

Send a test Slack message by choosing "Run Action"
Note: When the action runs successfully, you will get a notification in your Slack workspace and the ‘Action Done?’ cell will show “success”!

Step 7: How to Automate Slack Messages
Great job! We’re almost done. Now we want the Slack messages to be automatically sent. That is the best part.
Hover over the header cell (in row 1) of the ‘Action’ column, right click on the cell or press the three dots in the cell, and select ‘Run column on a schedule’

The New Automation panel will appear. Choose an automation frequency and click Save.

Each interval you've selected (e.g. every 1 hour, or every day at a certain time) Lido will:
- Pull new rows from your connected Google Sheet
- Update the Lido spreadsheet cell values to depict the current state of your Google Sheet
- Send automated slack messages for a row if both our trigger conditions are met:some text
- Condition 1: Check column B (labeled Task Due) and see if a row’s value for that column = TRUE and
- Condition 2: Check column D (labeled Action Done?) and see if a row’s value for that column does not equal (<>) “success” (i.e., the message has not been sent yet for that row)
- Update the Action Done? cell to “success” for any rows whose Slack messages were just automatically sent
You will now be able to receive notifications automatically in Slack!
That’s it!
Section 3: How to automate Slack messages when a new row is added to your Google Sheet
Step 1: Prepare your Google Sheet Data
Open the Google sheet that you want to send a Slack message from every time a new row is added. Make sure the data is tabular (no blank rows or blank columns separating your data).
Click share in the top right hand corner. Click copy Link. We will paste this link into Lido in a later step to import your spreadsheet data.
Step 2: Connect your Google Sheet to Lido
We will use Lido, a new spreadsheet built to automate repetitive tasks, to connect to your Google Sheet and send automated Slack messages. You can create a free account here: http://www.lido.app/go/signup
Step 2.a: From the Lido Files page, click "New File"
Step 2.b: Click Connect Data and select Google Sheets.
Press connect data
Press Google Sheets
Next, paste in your Google Sheet URL. If it's your first time connecting a Google Sheet to Lido, you'll need to authenticate into a Google account that has access to the Google Sheet you're trying to connect to.

Paste your Google Sheet URL
After pasting the URL, click Connect with Google Sheets. You will get a message saying 'Successfully connected to Google Sheets’. Click Next.
Select the column headers you want to import and then click Add Data. By default, all the columns are selected by Lido. For our example, we need all the columns, so we simply click Add Data.

Well done! Your Google Sheet has now been imported to Lido.

Step 3: Add Columns for the SENDSLACK formula, the Slack Message, and a message status
We need to create columns for the following:
Step 3.a: Create a new Computed Column called Action. This will hold the SENDSLACK formula.
To create a Computed Column, hover over the last Google Sheet data column in your Lido file, and you'll see a + sign. Choose "Computed Column" and it will add an empty column to the right of the table. Double click on the header cell, and rename it Action.
Step 3.b: Create a new Linked Column called Action Done? This column will store a note whether or not a message has been sent.
Create a Linked Column the same way you created a Computed Column, but choose "Linked Column" instead. You will need to choose an ID column, and this should be another column in your data where the values are guaranteed to be unique. Columns with timestamps, IDs, or email addresses are often good choices for unique values.
Step 3.c: Create another Computed Column to store the personalized message to send. Name this Message.
Your file should end up looking like this:
Step 4: Create the Slack Message
Column E will be our ‘Message’ column, containing the slack messages we want to send when a new row is added to our Google Sheet. We'll create a personalized message that pulls in the person's name. In this example, we will input the below formula in cell E2 to create the message:
```=A2&" has completed the task."```
What the formula above does is read the value in cell A2, then combine it with the string “ has completed the task”. For example, if the value of A2 is John, the corresponding message is: John has completed the task.
Insert the formula in cell E2, then press Enter.
Lido will automatically apply the formula to all the below rows (with the correct cell references), generating the personalized message for each row!
Step 5: Create the SENDSLACK formula
We are now ready to create the formula to send Slack messages. The formula is:
```=IF(action_done<>"success", SENDSLACK(<sender-credential>, “channel”, message, action_done cell))```
Where:
Credential: A credential associated with your Slack workspace. You can enter this by typing in the first part of the SENDSLACK formula then pressing "Add Credential".

A new tab will appear, showing Lido is requesting permission to connect to your Slack workspace of choice. Click Allow:
Channel: The name of the Slack channel you want to message. The channel name should be surrounded by quotes as so: “channel”.
Message: The Slack message you want to send. This can be a cell reference (like A2), a string (like “hello”), or a mix of cell references and strings (like “Hello “&A2) - where A2 is someone’s name.
Action_done cell: This is optional. It’s the cell that gets updated with “success” when you have successfully sent the Slack message for a row. In this example, for row 2 this would be cell D2.
The SENDSLACK formula should be implemented in the row 2 cell of the ‘Action’ column. In this example, the formula will go in cell C2, and the full formula looks like this:
In our example, this formula in cell C2 is:
```=IF(D2<>"success", SENDSLACK(<sender-credential>, "channel", E2, D2))```
The formula will check the below condition for whether a Slack message should be sent or not:
- Condition: Check column D (labeled Action Done?) and see if a row’s value for that column does not equal (<>) “success” (i.e., the message has not been sent yet)
If the above condition is met, Lido will:
- Send the message stored in Column E (labeled Message) via Slack
- Write success to column D (labeled Action Done?) to mark that the message has been successfully sent via Slack for a row
- Hide the SENDSLACK formula in the Action column for the rows whose Slack messages were sent (i.e., where ‘Action Done?’ = “success”)
After adding the formula, press Enter. Lido will apply the formula to all the rows in the Action column.

Step 6: Send a Test Slack message
If you haven't tested SENDSLACK, hover over one of the rows that is ready for a Slack message to be sent:
- Any row whose value for the ‘Action Done?’ column does not equal “success”
Right click on or click on the three dots of the cell showing the SENDSLACK formula, and press Run Action from the pop-up menu (see the GIF below for an example):.
Send a test Slack message by choosing "Run Action"
Note: When the action runs successfully, you will get a notification in the Slack workspace and the ‘Action Done?’ cell will show “success”!
Step 7: How to Automate Slack Messages
Great job! We’re almost done. Now we want to automate messages in Slack (we don’t want to manually click on our spreadsheet to send them!). Automation is the best part!
Hover over the header cell (in row 1) of the ‘Action’ column, right click on the cell or press the three dots in the cell, and select ‘Run column on a schedule’
The New Automation panel will appear. Choose an automation frequency and click Save.
Each interval you've selected (e.g. every 1 hour, or every day at a certain time) Lido will:
- Pull new rows from your connected Google Sheet
- Update the Lido spreadsheet cell values to depict the current state of your Google Sheet
- Send automated slack messages that need to be sent for a row if our trigger condition is met:some text
- Condition: Check column D (labeled Action Done?) and see if a row’s value for that column does not equal (<>) “success” (i.e., the message has not been sent yet)
- Update the Action Done? cell to “success” for any rows whose Slack messages were just automatically sent
You will now be able to receive notifications automatically in Slack!
That’s it! That is every way to send automated slack messages and just using a spreadsheet!
We hope that you now have a better understanding of how to send automated Slack messages. If you enjoyed this article, you might also like our article on how to send automated emails to customers or our article on how to set up automated email reminders.