
In this article, we will show you how to automatically send email from Excel with attachment. Simply follow the process below.
Like many people, you’re probably wondering: “how to automatically send email with attachment from excel?”. This article will help.
Upload your excel file to Google Sheets or create a new Google Sheets. Choose whatever works best. In this example, we are going to make a Google Sheet holding a list of customers who have submitted payment. We’ll make sure the Google Sheet is formatted as so:
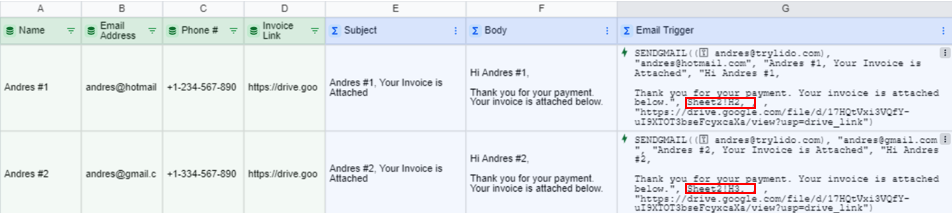
Notice that in column D, I am including the links to the customers’ invoices (in this example we’re simply using Google Drive PDFs!). I want to send the invoices as attachments via email automatically:

Make sure your data is formatted in a tabular fashion as seen above
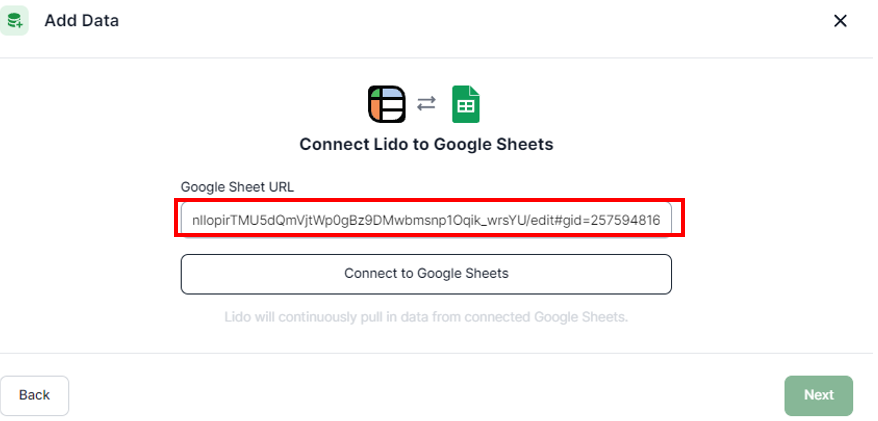
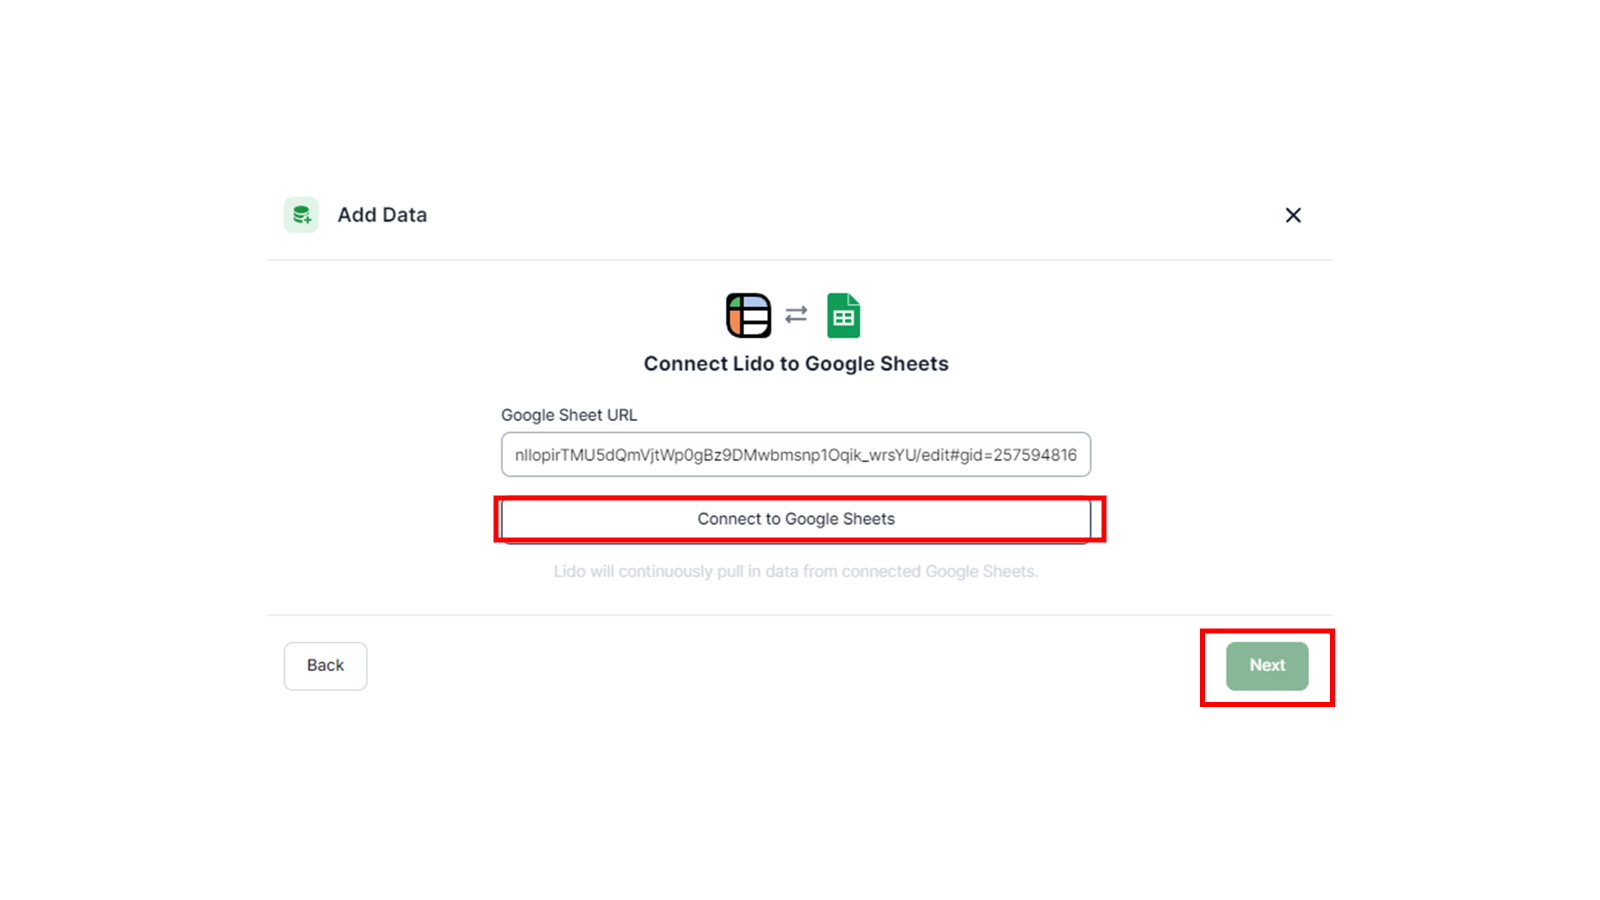
Copy the URL for your Google Sheet.
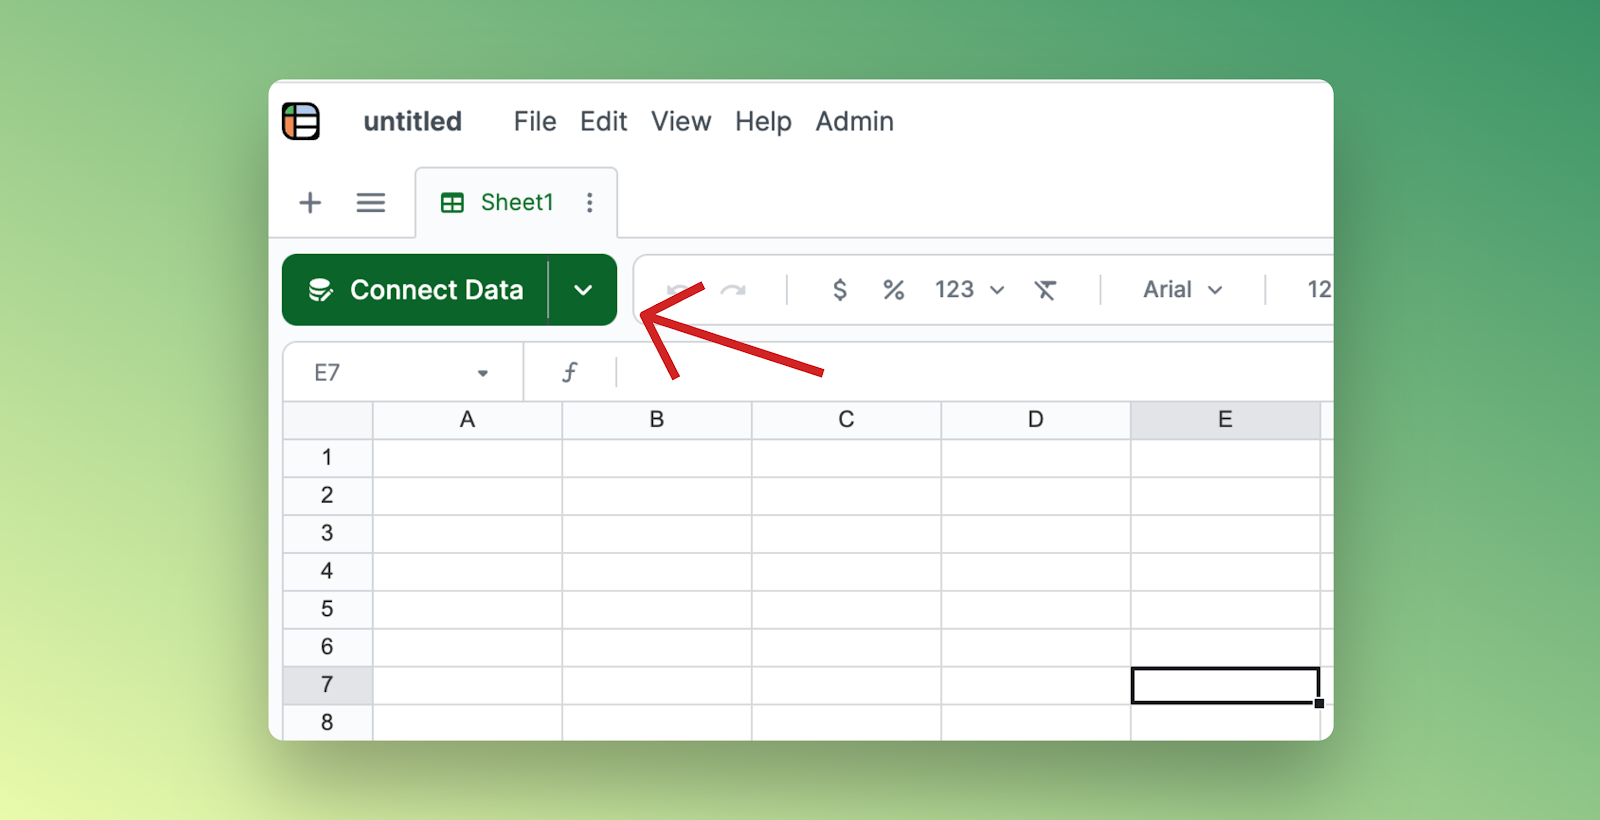

Note: Renaming or deleting columns from within your Google Sheet can interrupt the connection to Lido. If this happens, in your Lido file click on "Edit Data" to reselect the correct Google Sheet data columns to pull in.
We are now ready to create the subject and body of the automated emails.
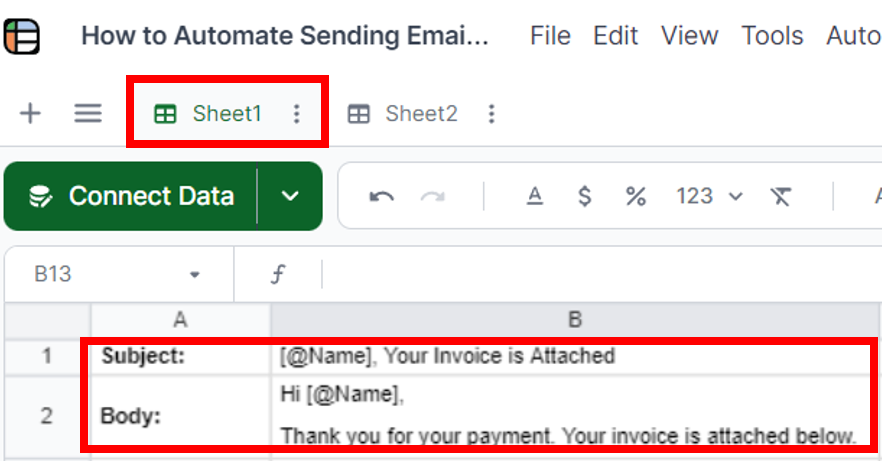
Now that we’ve made our email templates, we need to use them to actually create the personalized email subject and bodies for each of our data rows. We'll do that by creating two new computed columns for both Subject and Body. Then, we’ll use a formula called STRINGTEMPLATE() inside of the computed columns.

```=STRINGTEMPLATE(Sheet1!$B$1)```
Remember to anchor your STRINGTEMPLATE formula
In our example, Sheet1!$B$1 is the location of our email subject template. Make sure you replace this with the cell holding your template (if different). Anchor the cell reference with $ signs, as all rows will use the same template cell.
```=STRINGTEMPLATE(Sheet1!$B$2)```
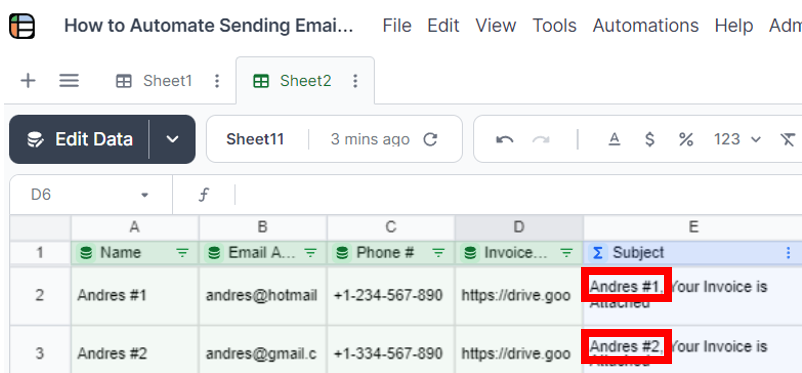
Our data table in Lido now looks like this:

Unlike Google Sheets, Lido's spreadsheet has a special type of formula called Action Formulas. SENDGMAIL and SENDOUTLOOK are Action Formulas that send emails. In this case we will use SENDGMAIL.
SENDGMAIL works as follows:
=SENDGMAIL(sender_email_credential, recipient_email, subject, body, [status_cell], [CC], [BCC], [attachment])
Where:
sender_email_credential: your sender email account (e.g., your@email.com) that we will connect to
recipient_email: the email of the person receiving the email
subject: the email subject
body: the email body
[status_cell]: an optional status argument. A cell that will show “success” when the email for a row has been successfully sent
[CC]: optional argument for CC’ing email addresses
[BCC]: optional argument for BCC’ing email addresses
[Attachment]: optional argument for including attachments
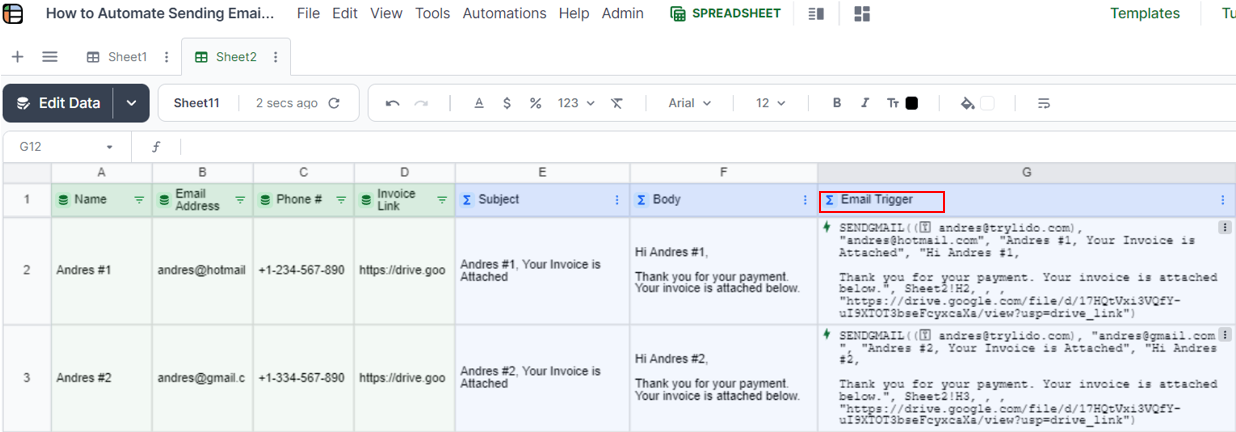
In our example, the core SENDGMAIL formula looks like the following and will go in row 2 of the next blank column right of our table (cell G2 for us):
```=SENDGMAIL(<sender_email_credential>, B2, E2, F2, H2,,,D2)```
You'll need to add a credential to connect your Gmail (or Outlook) account to Lido. To do this, start typing =SENDGMAIL(.
When you're in the first argument of =SENDGMAIL(), click on the "+Add credential" button to connect to your Gmail sender email address. The GIF below shows how to do this:
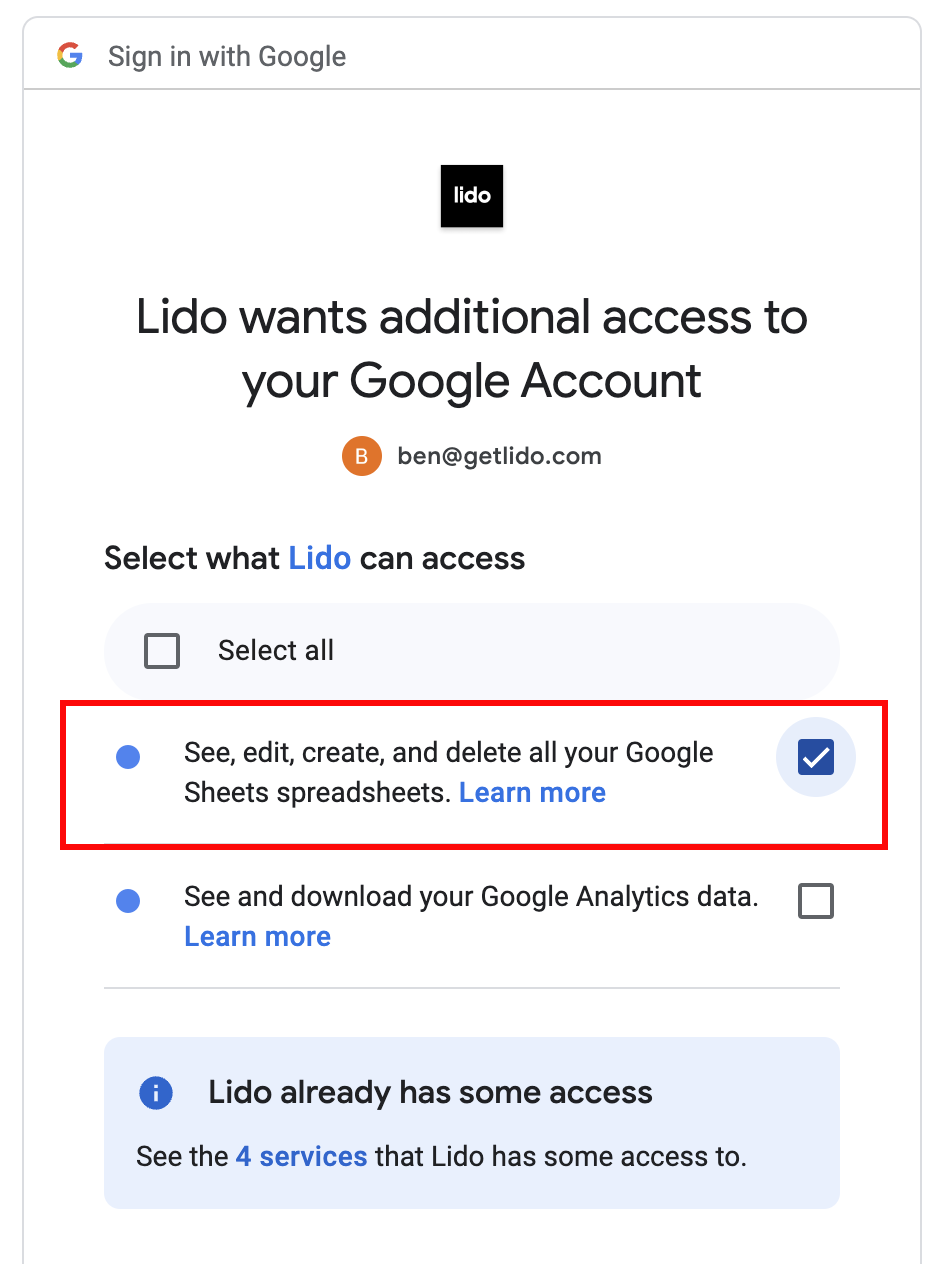
Make sure to follow the connection flow and grant the necessary permissions so Lido can send automated email reminders on your behalf from your sender email address.
Note: your SENDGMAIL formula should be in the row 2 cell of the next blank column right of your data table. For our example, this will be G2. Computed columns are special columns created when you enter a formula right next to a table of data in Lido. These columns automatically apply your formula to every row in your dataset, with the correct cell references (i.e., row 2 cell references for row 2, row 3 cell references for row 3 and so on).
Double click on the row 1 cell (header cell) of the column holding the SENDGMAIL formula - this is Column G for us - and rename it to Email Trigger
Our Lido table now looks like this:
As you may have noticed, in this example we set H2 as the status_cell for our SENDGMAIL formula when inputting the formula into cell G2; and the computed column has applied that SENDGMAIL formula to every row in our data table with the correct cell references for each row. For example, for row 3 the status_cell in SENDGMAIL is H3.
So, in our example, column H will be the Status column tracking if a row’s email has been successfully sent.
Note: A Linked Column is a special kind of Lido column that lets you add data in Lido that stays "stuck" to the correct row of your external, connected data (e.g, Google Sheets data) - even if the external data source rows change order (cool right?!).
For a Linked Column to work, it needs to use another column as a unique ID column (b/c we’ll be assigning each row’s Status value a unique ID). It’s important to pick an ID column with unique values - this is how Lido correctly keeps Status values (like “success”) stuck to the correct row - even when your external data rows change order.
We will choose Email Addresses as our unique ID - the GIF below shows an example of how to do this:

Double click on the header cell (row 1 cell) of your status column - for us this is cell H1 - and rename the column “Status”
Our data now looks like this:
Let’s say we only want to send an email once to each customer when we confirm payment has been received (which is when we input their information in a Google Sheet row) - this is when we should send them an email with the invoice attachment. In other words, we want to send an email every time a new row is added to our Google Sheet. So, we’ll add an IF statement around SENDGMAIL - you can do this in any SENDGMAIL formula, but I suggest making changes in the row 2 SENDGMAIL formula:
```=IF(H2<>"success", SENDGMAIL(andres@trylido.com, B2, E2, F2, H2, , , D2))```
Where:
Note: remember to use your own sender_email_credential for your own sender email address and use the correct cell references for the rest of the arguments
Press enter. The formula will be automatically applied to each row in the Email Trigger column with the correct cell references (notice how for row 3 all the cell references are for the third row; like D3 for the invoice link attachment)
The formula works as follows:
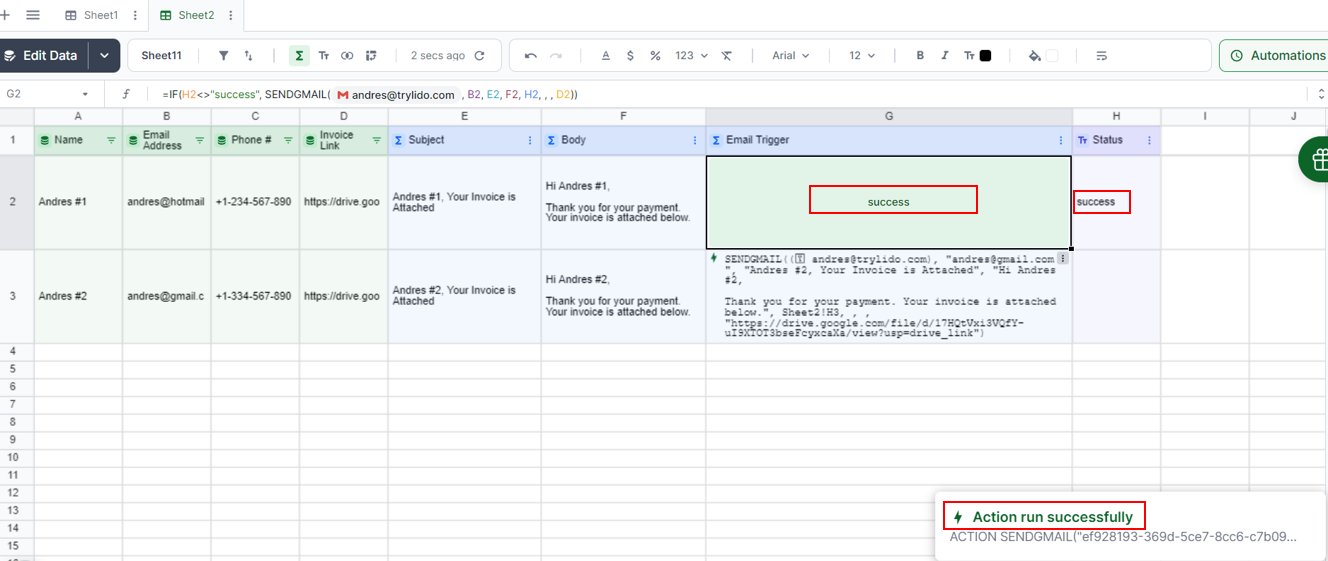
If a row’s Status value is not equal to (<>) “success” (in other words, a row’s email has not been sent yet) - then SENDGMAIL will display for that row and it will run for that row when our automation runs (keep reading!) - otherwise we display FALSE and no email will be sent.

As you can see above, the SENDGMAIL formula is visible for all rows since no emails have been sent yet, and thus, no row has a value of “success” for the Status column.
Right click on any of the SENDGMAIL action formulas and click "Run action" to send an email:
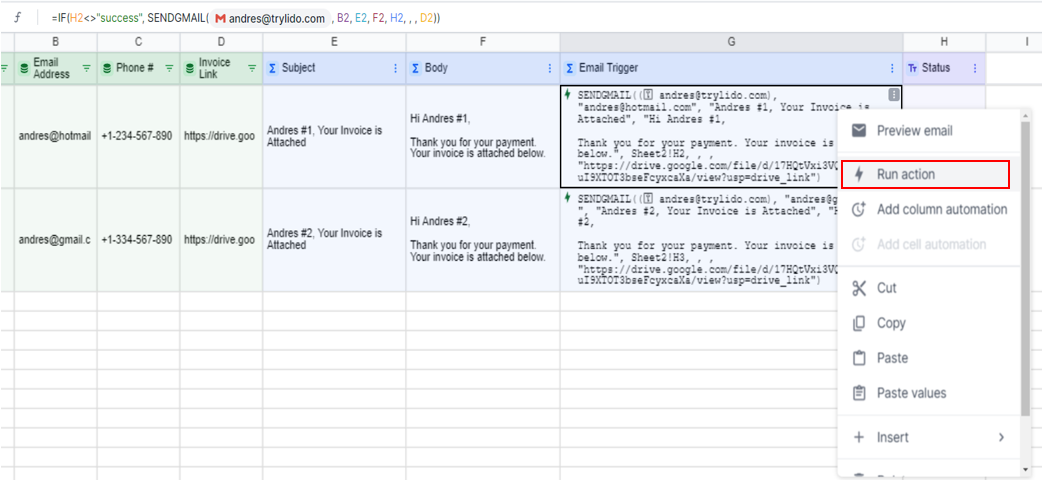
Right click on a visible SENDGMAIL action formula and select Run action to test send an email
If everything is set up correctly, you’ll see:
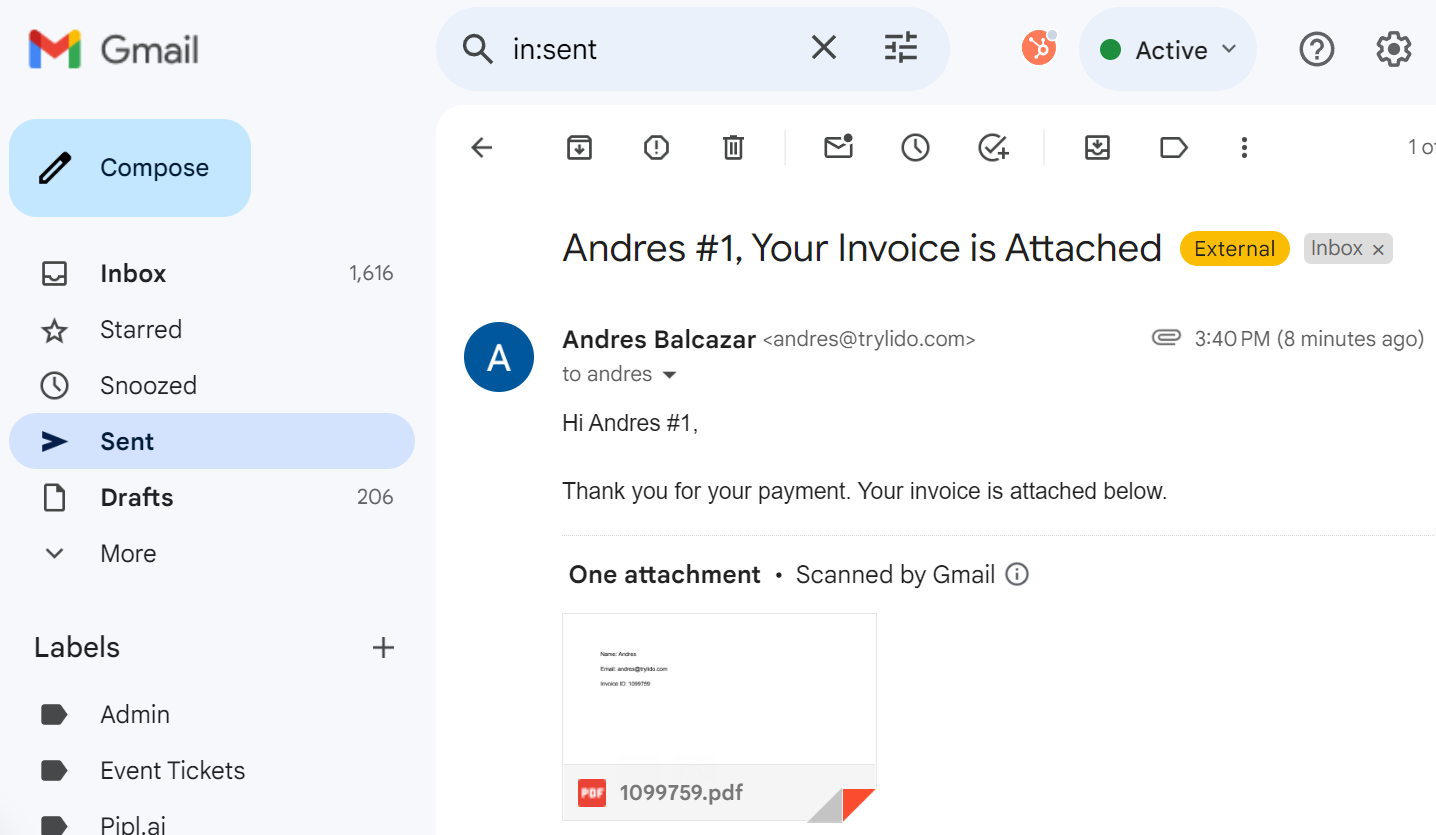
Note: you can double check the email went out by going to your sender email address’s outbox and check that the email was sent. Here is the example email I sent as depicted in my outbox (notice the attachment!):
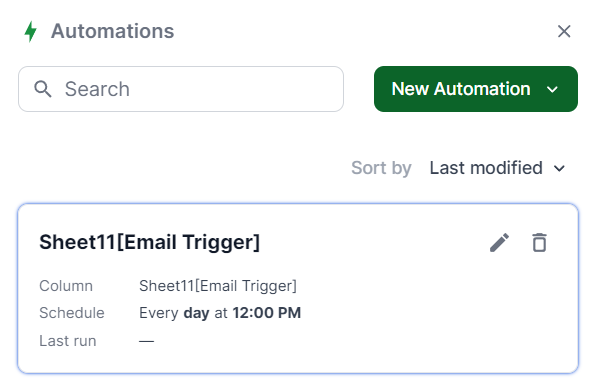
Now, for the fun part. We can automate the running of the Email Trigger column. For rows where SENDGMAIL is visible in the column (i.e., rows whose Status value does not equal “success”), Lido will automatically run the SENDMGAIL action formula - even if the file is closed or you are logged out!
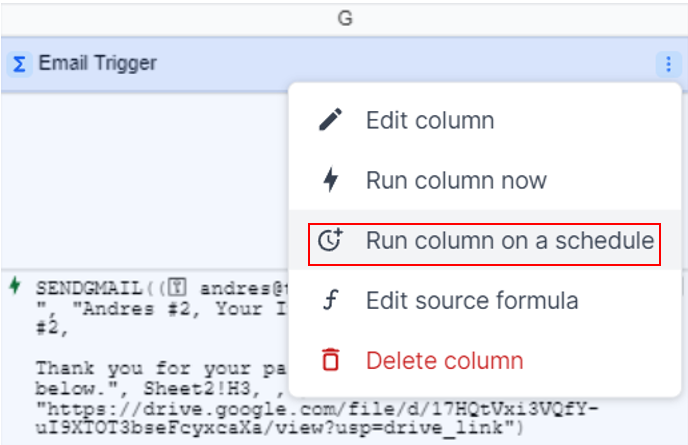
Click on the 3 dots of the Email Trigger header cell (row 1 cell) and select Run column on a schedule.
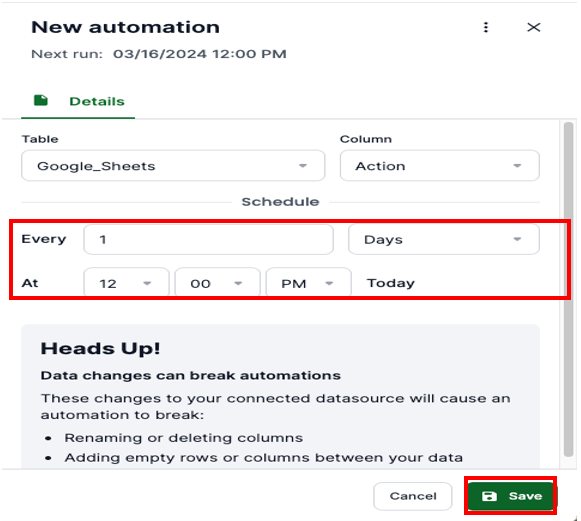
An automation panel will show up. Select the interval you want the automation to run on and press Save.
Note: everytime the automation runs (say every day at 12PM), Lido will do the following things:
…even when the file is closed or you are logged out. So, once you set the automation you can close the file and no more work needs to be done!
Attachments need to be passed through as URLs. We only support attachments less than 25MB at this time.
Here are instructions for how to find this link from common places:
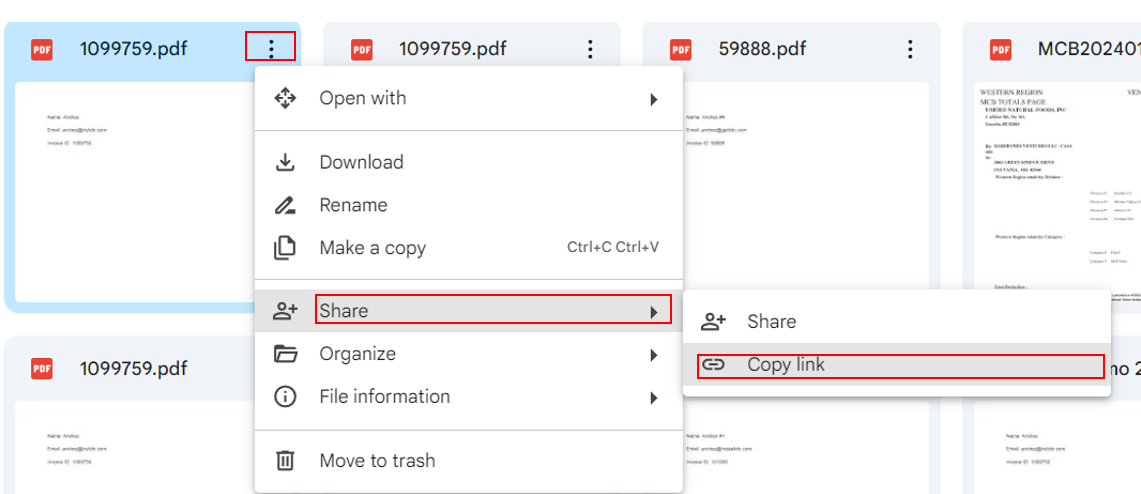
For Google Drive links you can use the ‘Share link’ of the Google Drive file you want to attach to an email:
You can also open the file and use the file’s URL directly as well.
1. Find the normal sharing link from Dropbox: Go to Dropbox.com, find your file, and click the Copy link button that appears when you hover over it. Or, on your desktop, right-click on the file, and select Copy Dropbox Link.
You should have a link like: https://www.dropbox.com/s/hriinb9w3a2107m/iPad%20intro.pdf
2. Replace the www.dropbox.com with dl.dropboxusercontent.com, which will give you a link like: https://dl.dropboxusercontent.com/s/hriinb9w3a2107m/iPad%20intro.pdf
3. Pass the link from step 2 into your SENDGMAIL or SENDOUTLOOK formula
You can send multiple attachments using two methods:
=SENDGMAIL(<your GMAIL credential>, recipient, subject, body,[status_cell],[cc], [bcc], array(url1, url2))
OR
=SENDGMAIL(<your GMAIL credential>, recipient, subject, body, [status_cell],[cc], [bcc], "url1, url2, url3")
For more documentation on SENDGMAIL and all its arguments (including attachments) go read this documentation.
For more documentation on SENDOUTLOOK and all its arguments (including attachments) go read this documentation.
For automatically sending emails based on cell values in your spreadsheet, read this article.
For automatically sending emails every time a new row is added in your spreadsheet, read this article.
Upload your excel file directly to Lido or copy and paste your excel data to Lido
1. Copy the data from Excel to Lido. In Excel, select the table range you want to copy, then right-click and hit “Copy”.

In a new spreadsheet in Lido, right-click an empty cell and click “Paste”.

2. Alternatively, you can use Lido’s “Upload spreadsheet” function. You can find this by navigating to File → Upload spreadsheet → Excel file.

Once your data is formatted, right-click the selection and choose "Convert Table from Range". Save your named table and proceed to the next step.

Click here to get started with Lido! You know all you need to know on how to automatically send email with attachment from excel!
We hope that you now have a better understanding of how to send email from Excel with attachments.
