
In this article, we will show you how to automate sending emails in Sheets using Lido so that emails are automatically sent on a schedule.
Automation in Sheets used to require Apps Script, which can be hard to learn. Lido is a spreadsheet fully compatible with Sheets and has automation built in—so you can automate tedious tasks like invoice scanning without code and extract invoice data straight into your tables.
Imagine you have a list of multiple customers and you have to create multiple customized emails for each of them. Doing this for a long database will take you a while to finish. Using Sheets makes this easier and here’s a simple guide for you to follow to automatically mail merge and send them.
We will put recipient details in Sheet 1, including the recipient name, mailing address, and other details you want to customize in your text body. Remember to separate each in a new column.

Lido is a new spreadsheet built for automation that is fully compatible with Sheets. Using Lido will allow us to create an automation to send emails with normal spreadsheet syntax in just a few simple steps instead of having to use Apps Script or other complicated code.
You can create a free account at https://www.lido.app/go/signup.

Click on the green Connect Data button in the upper left corner, then click Sheets.

Paste in the Sheets URL for the email marketing spreadsheet you created earlier and click connect to Sheets.
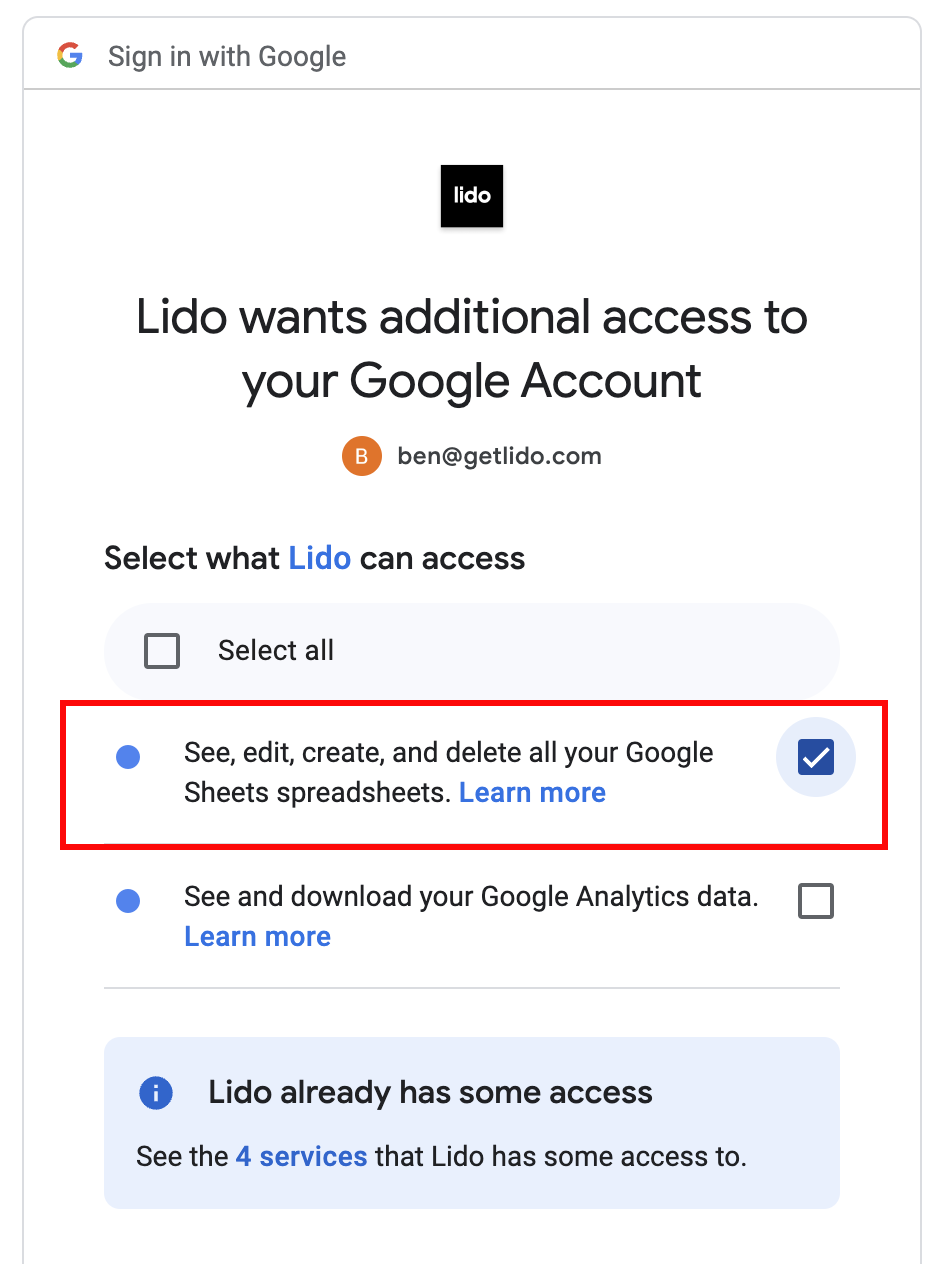
This will load a box asking you to authenticate your G account. Make sure that you check the option that gives Lido access to your Sheets. Once that has been done you can click Next.

Select the columns from your Sheet that you want to connect to Lido. Lido will automatically keep records updated from your Sheet, so don’t worry if you plan to add more records.
Click Add Data and your spreadsheet data has now been imported to Lido as a table.

You can also pull in data extracted from documents like invoices. If you're working with accounts payable or billing data, discover why our invoice OCR tool is considered the best in the industry for invoicing and accounts payable OCR. It lets you extract invoice data directly into your spreadsheet and saves some of our customers hundreds of hours per month.
In a new worksheet, type in your email subject and body content. Reference your columns as variables using this format: [@Column].
In the example below we entered the text below in Column B:
Email subject:
Thanks for your inquiry, [@Name]
Email body:
Dear [@Name], thank you for your inquiry about [@Service].

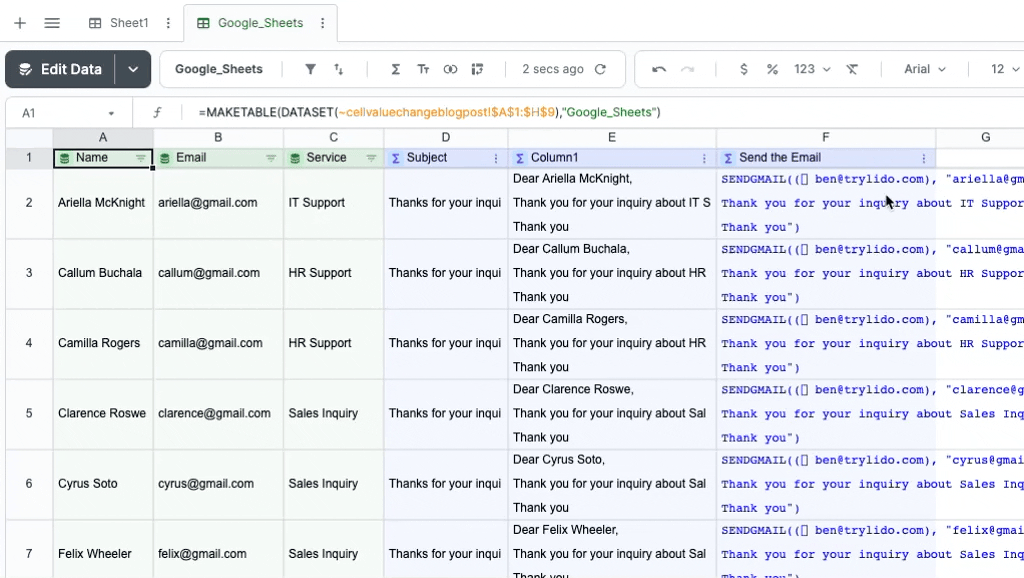
In order to have dynamic Subject and Body content for each customer record, we will create Subject and Body columns based on the templates you created in the previous step and pull in dynamic fields from the row.
Lido has a formula called =STRINGTEMPLATE() that replaces column references (like [@Name]) with the values of a row in a table. We will use this to create dynamic email subjects and bodies.
Make a computed column by entering this formula in the second row of the blank column next to your table:
```=STRINGTEMPLATE("email_body_cell")```
Where:
email_body_cell is the cell location of the email body we made in step 5. (Remember to use an absolute reference - like Sheet1!$B$1).
This will automatically create a computed column.
^^^
computed-column
What is a computed column?
A computed column is a special type of column in Lido that automatically applies the same formula to every row in your table.
^^^
Our formula in cell D2 for email subject will be:
```=STRINGTEMPLATE(Sheet1!$B$1)```
And then for cell E2 for email body it is:
```=STRINGTEMPLATE(Sheet1!$B$2)```
Your table should now have Subject and Body columns with dynamic content, like this:

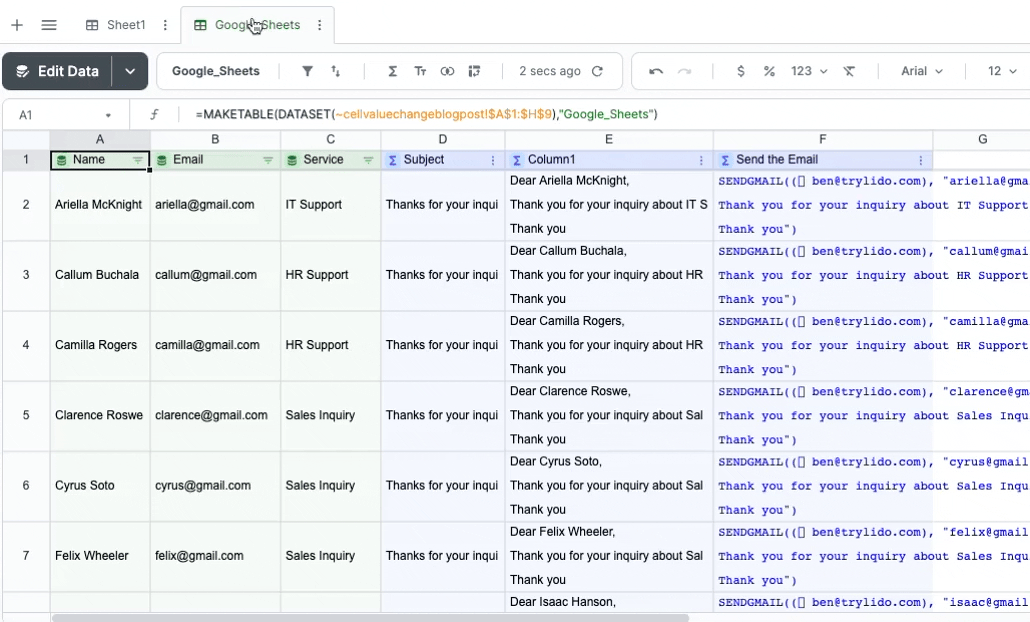
The formula to send an email from Lido is:
=SENDGMAIL(<sender-credential>, recipient, subject, body, status_cell)
^^^
formula
SENDGMAIL is an Action formula
Action formulas are a special type of formula unique to Lido. Unlike other spreadsheet formulas, they don't run immediately when you type them in. You need to explicitly run them manually or with an automation.
^^^
In our example this will be:
Sender-credential: a credential you create for your@email.com (This should be the email address associated with a Gmail or G Apps account)
Recipient: email address in B2
Subject: D2
Body: E2
Start typing =SENDGMAIL() in a cell directly next to your body column in the second row. When you're in the first argument, click on the "+" to add a sender credential to your Gmail (or G Apps) account.
Follow the flow and you will now have a credential for your Gmail.

Finish out the formula:
```=SENDGMAIL(<sender-credential>,B2,D2,E2)```
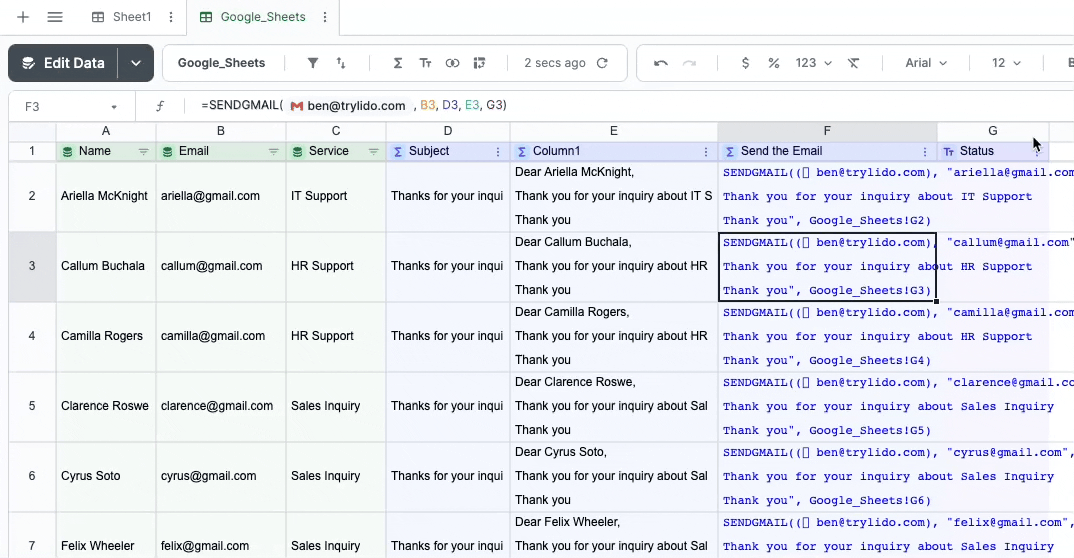
You can then rename the column Send the Email.
Now you should have something that looks like:

Let’s test one of these actions to run. Right click on a SENDGMAIL formula and click Run action. You’ll need to authenticate into your Gmail account the first time.
It's a good idea to run a test before running an entire mail merge so you can check for formatting issues or other errors.
If you want to send all emails in your column at once, click on the 3 dot menu in your SENDGMAIL column, then select Run column now.
If you don’t want to manually run your email actions every time, you can set up a Lido automation to do it for you.
In the 3-dot menu for your SENDGMAIL column, select Run column on a schedule.

This will open the automation panel. Select an option for how frequently you want to run every SENDGMAIL Action in the column. Before every automation run, Lido will automatically fetch the latest data from Sheets as well.

In this example, we are going to automatically send out our emails once per day at 9:30am.
Click Save to create your new automation.
If you are planning to run this automation regularly and don't want to email the entire list each time, it is a good idea to create a status column where we can keep track of who has already been sent an email.
1. Create a status column by typing "Status" in the top cell of the next empty column.
This will automatically create a Linked Column in Lido. A Linked Column is a special type of column in Lido where you can put any text value and it magically stays in sync with your Sheets data.
2. Select email as the column that will have unique values
Note: for Linked Columns to work, you need to have a column in your sheets data whose values are unique - and that includes blank values. Timestamps work well, email addresses often do, or other record IDs
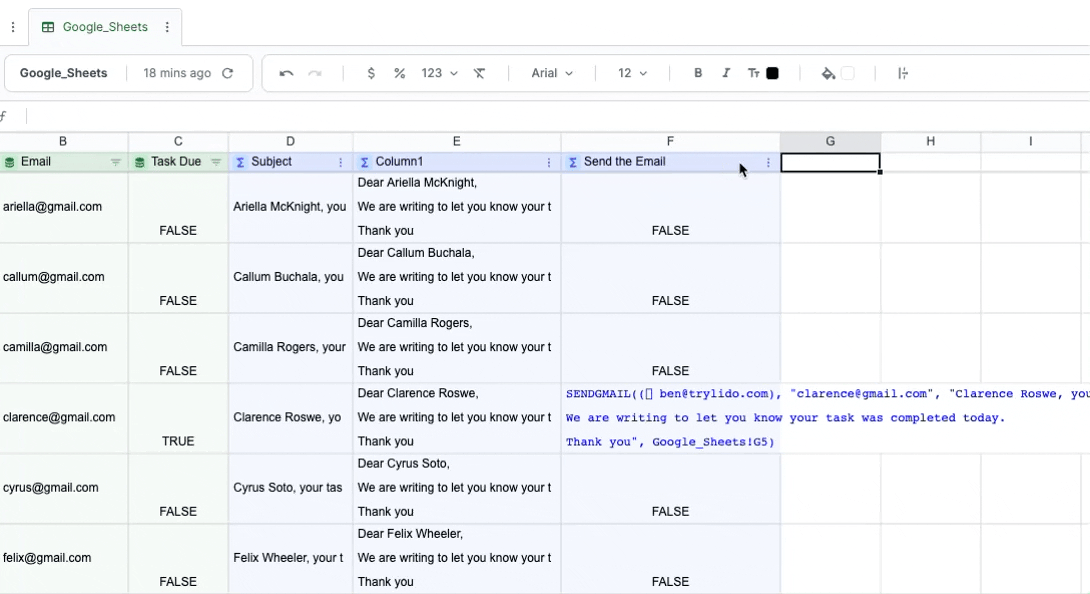
Next, add a 5th parameter to SENDGMAIL that will update the status column with the result of sending the email ("success" or an error). For our example:
```=SENDGMAIL(<sender-credential>, B2, D2, E2, G2)```
When SENDGMAIL is run, it will put the status in cell G2. If it runs successfully, the value "success" will be saved in G2. If there is an error, the error message will be saved in cell G2.
Send another Test email and you should see this:
Finally, we will wrap our SENDGMAIL formula in an IF statement to check if an email has been sent already (column G = "success") and only show SENDGMAIL if it has not been sent. Otherwise, FALSE is displayed.
When the column is run now, only rows that have SENDGMAIL in them will trigger emails (these are the rows that have not yet had an email sent). Once any new emails have been sent, the status column will be updated with "success", and emails will not be sent a second time for that row.
=IF(CELL REF <> “success”), SENDGMAIL(<sender-credential>, recipient, subject, body, CELL REF))
Where:
CELL REF <> “success” - This is the cell in your status column that is not filled with success
For our example below, we use the following formula in row 2.
Remember, a computed column automatically uses the same formula in all rows, so you can edit any row, just make sure you use the correct row number. We generally use row 2 in examples
```=IF(G2<>"success", SENDGMAIL(<sender-credential>, B2, D2, E2, G2))```
You can see that for emails that have already been sent (column G = "success") they display FALSE instead of SENDGMAIL.

And those are a few ways to make sending emails easier for work or personal use. Having the power to do these with multiple emails in scheduled automations based on data in Sheets save you a lot of time and effort. This is our new updated method instead of using our old sendemail script (also known as apps script).
If you’re working with large datasets like invoices and want to auto-fill values into your spreadsheet for analysis, see how Lido uses OCR to extract invoice data directly into your spreadsheet.
How to Create an Area Chart (2025 Guide)
Understanding eCommerce Metrics: Average Order Value (AOV)


