Do you need to process several ranges of data at the same time in Google Sheets? Remembering their absolute or relative references can be tiresome as there is no way to easily identify a whole cell range. To help you handle this, Google Sheets has a feature called Named Ranges. These are shortcuts to specific ranges that you can define and use in your formulas. In this tutorial, you will learn how to create, use, and edit or delete named ranges in Google Sheets. Are you ready?
Step 1: Select the data range in your Google Sheet to be named or create a new range.

Step 2: Click the Data tab, then select Named ranges.

Step 3: The sidebar Named ranges appear on the right side of Google Sheets. A text box for the range name and the range will appear. The range of the selected cells will automatically be loaded in the Range box. To name the range, simply type a descriptive name of your choosing (preferably something simple) in the Name textbox, then click Done.
REMINDER: When creating named ranges in Google Sheets, remember that the name can contain only letters, numbers, and underscores.

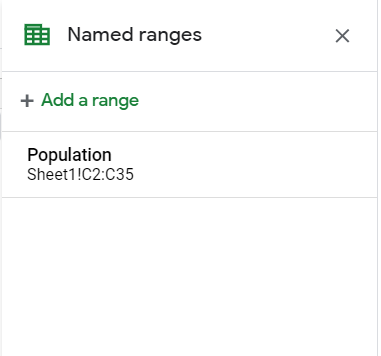
The named range will be listed in the sidebar with all the ranges. If you will use these named ranges in Google Sheets frequently or create more as you add new data, it is best to keep the sidebar active.
Now that you can create named ranges in Google Sheets, let's discuss how to use them effectively in your spreadsheets.
Named ranges are designed to be used in Google Sheets formulas in place of cumbersome cell references that refer to absolute or relative references. All the formulas that accept cell ranges will accept named ranges. For example in the following function, we can simply use the name of the named range inside the SUM function to calculate the sum of all the values stored in the named range:
=SUM(Population)
As you type the named range, the named range Population will appear in the drop-down list for autocompletion. You can either continue typing or simply press Tab or Enter to autocomplete.

The result will be the same as specifying the absolute reference:

Named ranges work just as well when you want to use ARRAYFORMULA as a shortcut in applying a formula to an entire cell range. With the following formula, we want to divide individual entries in the range by 2. To do so, we simply need to use ARRAYFORMULA just like when the absolute or relative references are used:
=ARRAYFORMULA(Population/2)
The result is

You can learn more about ARRAYFORMULA here.
If you are a regular user of Google Apps script in Google Sheets, you can use it to manage your named ranges. Using the commands below will allow you to incorporate named ranges in your scripts and create simpler scripts overall.
Create: createNamedRange()
Get: getRangeByName()
Read: readNamedRange()
Write: writeToANamedRange()
Log: logNamedRanges()
Step 1: On the Named ranges sidebar, click the pencil symbol, labeled Edit, on the listed named range.

Step 2: The textboxes will appear. You can either rename the named range by typing a new name in the Name textbox or delete it by clicking the Delete range icon on the right of the textbox.

If you want to rename the range, delete the existing name in the textbox and type the new one, then click Done. This will not break the formulas; they will be updated with the new name and will still work.
If you want to delete the named range, simply click Delete range. A prompt will appear reminding you that doing so will break the formulas that use the given named range. Click Remove if you are sure about your choice.

Conveniently located in the Data menu, the named ranges option allows users to create cell references for specific cell ranges that they will often use. A named range in Google Sheets has several benefits, both for the user and anyone who reads the spreadsheet. The spreadsheet user can more easily remember and use the named ranges in Google Sheets than a complicated cell range reference, and anyone who reads the spreadsheet will find simple formulas that do not fill up the whole formula bar. Put simply, named ranges will turn your complex spreadsheets into simple, well-designed displays of your information.
Related Articles
-Absolute Reference in Google Sheets
-Reference Another Sheet in Google Sheets
We hope this article has helped you and given you a better understanding on how to use named ranges in Google Sheets. You might also like our articles on how to add a radio button in Google Sheets and how to create dynamic named ranges in Google Sheets.
To optimize your workflow, we recommend reading our guide on how to extract a domain from an email in Google Sheets to an email and trying our software for rent reminders.
Save hours on repetitive and tedious work. Lido is a new spreadsheet that connects your spreadsheets, forms, PDFs, and email inbox.


.png)