In this article, we'll cover how to automatically send emails to different people based on a response in Google Forms. This is useful in a lot of different scenarios. Maybe you intake customer support requests with Google Forms, and want to route new submissions to different people based on the type of complaint. Or, perhaps you want to personalize emails for an event based on an attendees selected interest. Read on to see how we can accomplish this in a few minutes, without writing any custom code.
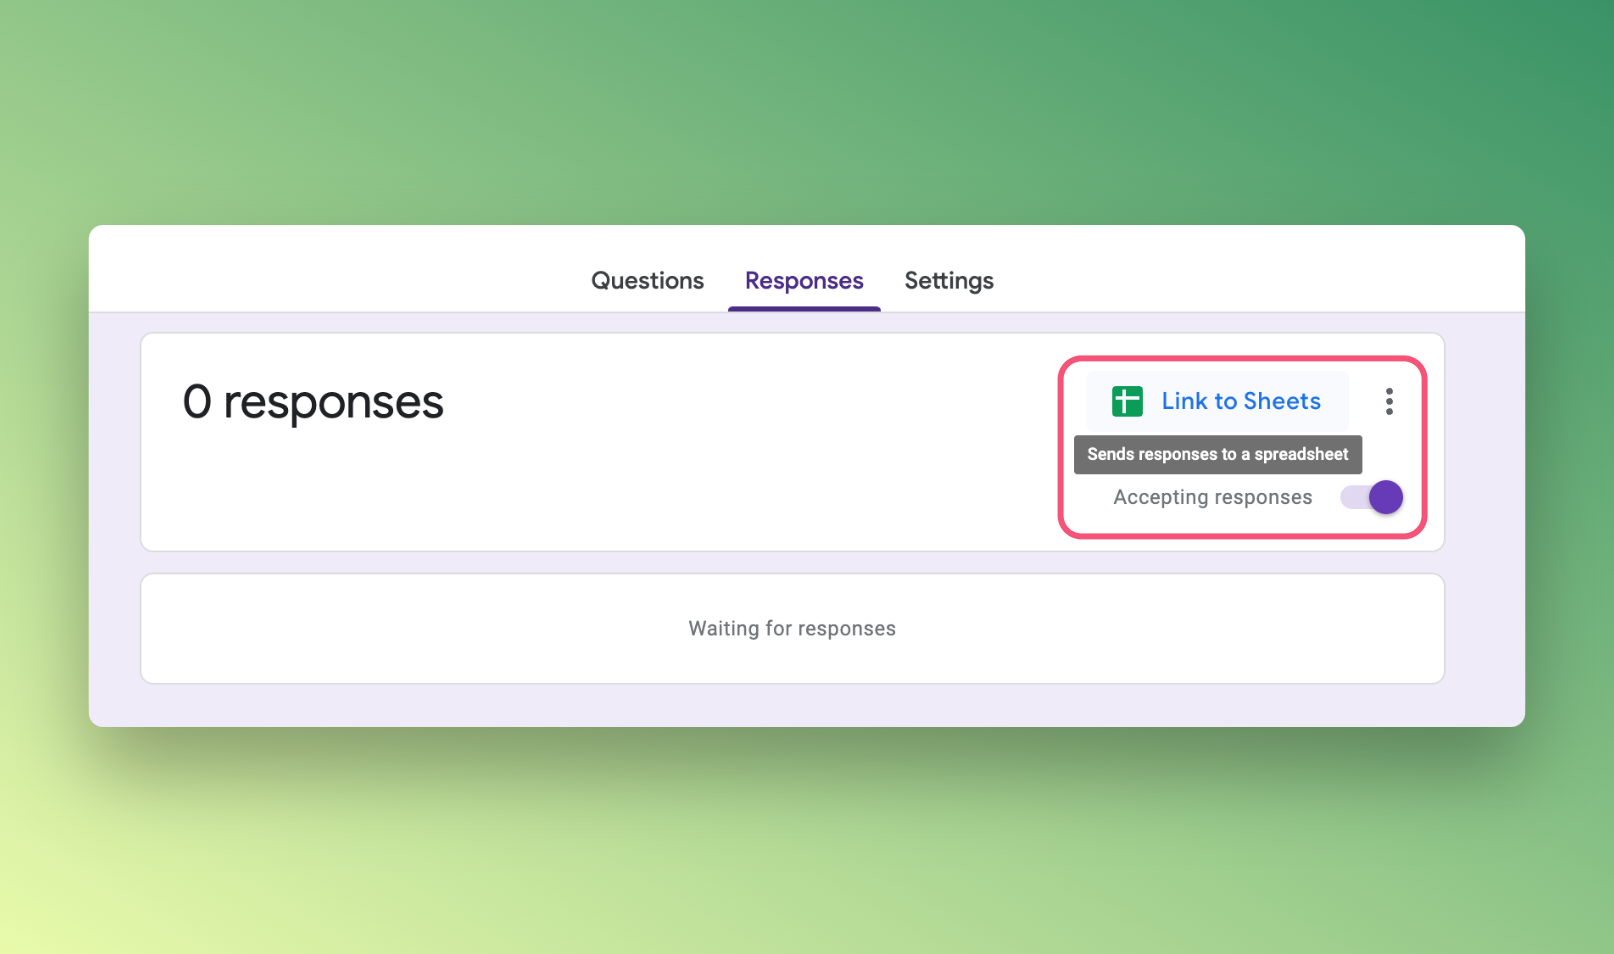
To start, we'll need to connect our Google Form to a Google Sheet. This is a feature that's built into Google Forms. You can access it by going to the responses tab in the top bar, then clicking Link to Sheets.
Select Create a new spreadsheet in the next screen.

Then click Create.
The new Google Sheet will open automatically. Copy the Google Sheet URL, we'll need this in the next step.
Since there is no way to send emails directly from a Google Sheet, we'll need to connect the data in the Google Sheet to Lido. If you don't already have a Lido account, you can create one here: https://www.lido.app/go/signup.
There is a free plan that will let you send up to 20 emails / month, and then paid plans starting at $19/month after that.
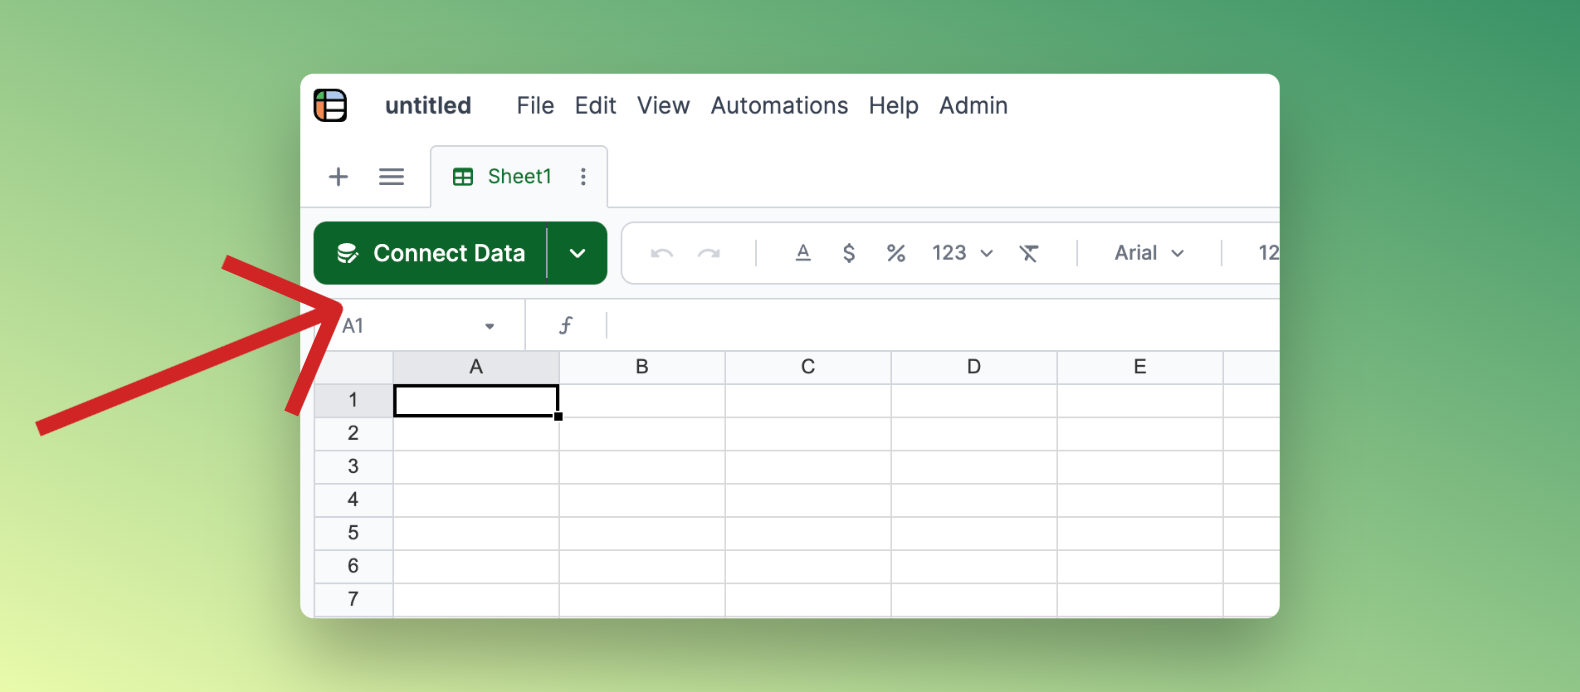
Create a new file. Then, click Connect Data and select Google Sheets as the datasource.
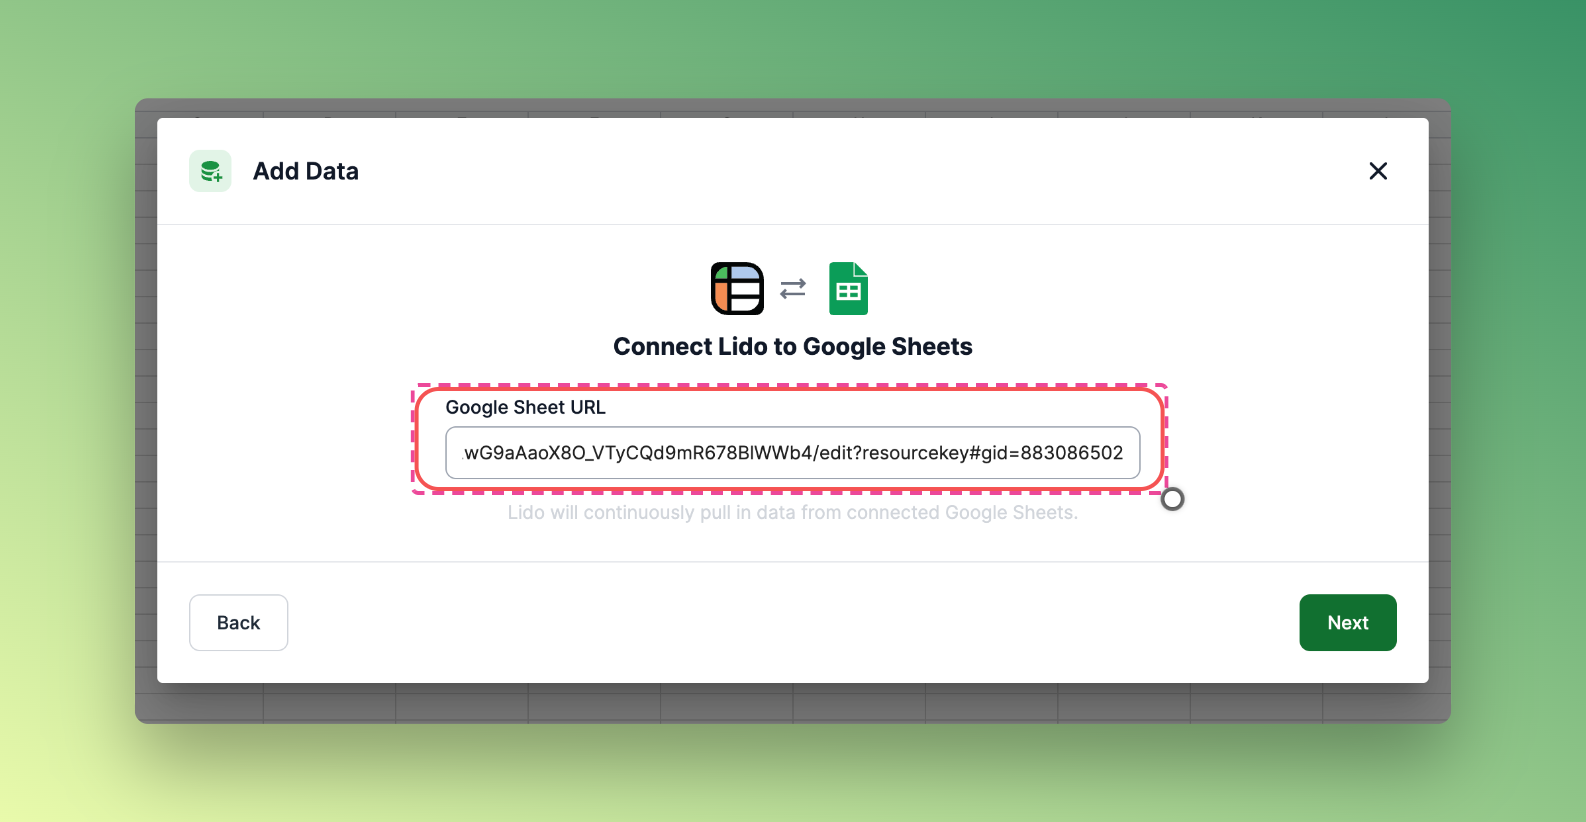
Next, paste in the URL from the Google Sheet that we connected to the Google Form in the first step.
On the next screen, select which columns you want to connect to Lido. At a minimum, you'll need to select any columns that you want to reference as variables in the automated email, as well as the column that you want to use as the conditional trigger.
Then click Add Data. After your data is successfully connected to Lido, it will look like this in your Lido spreadsheet.
Note: it's recommended that you have at least one form response recorded so that things work in Lido. If this is a new form, then we'd recommend entering in a dummy form response that you can delete later.
Next, we need to add the email templates for subject and body. We can make the content of each email dynamic by referencing data from each form response as a variable.
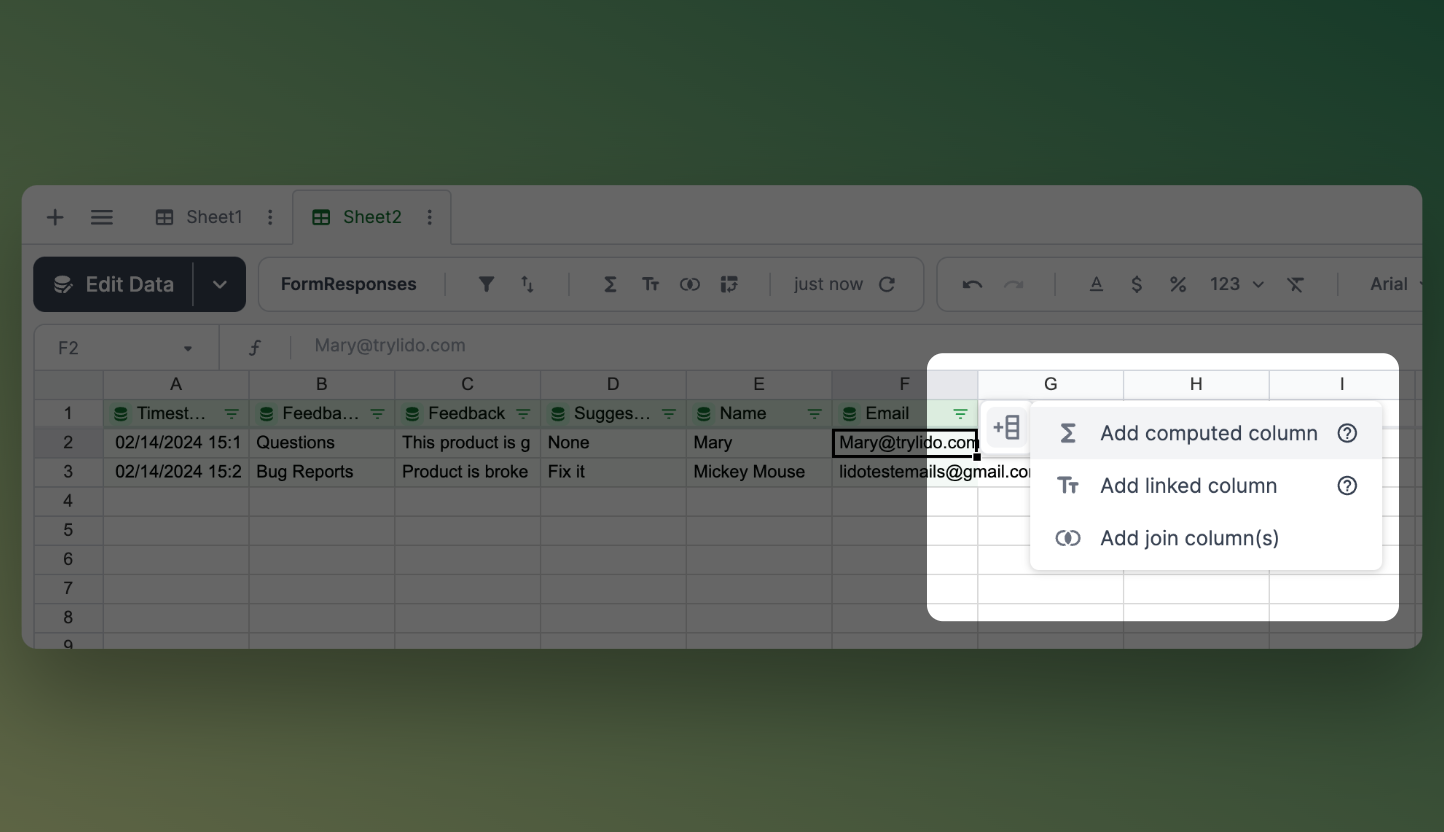
First, add a computed column to your spreadsheet table. This is a column type that will repeat the same formula down every row in the table, which is what we want an email template to do. Here is how to add a computed column:
We will write the email templates inside of the first row of the computed column. To make the contents of the email dynamic for every row, we can use the [@Column Name] syntax. Make sure you wrap everything in quotes ( " ).
For example:
```="Hello [@Name]"```
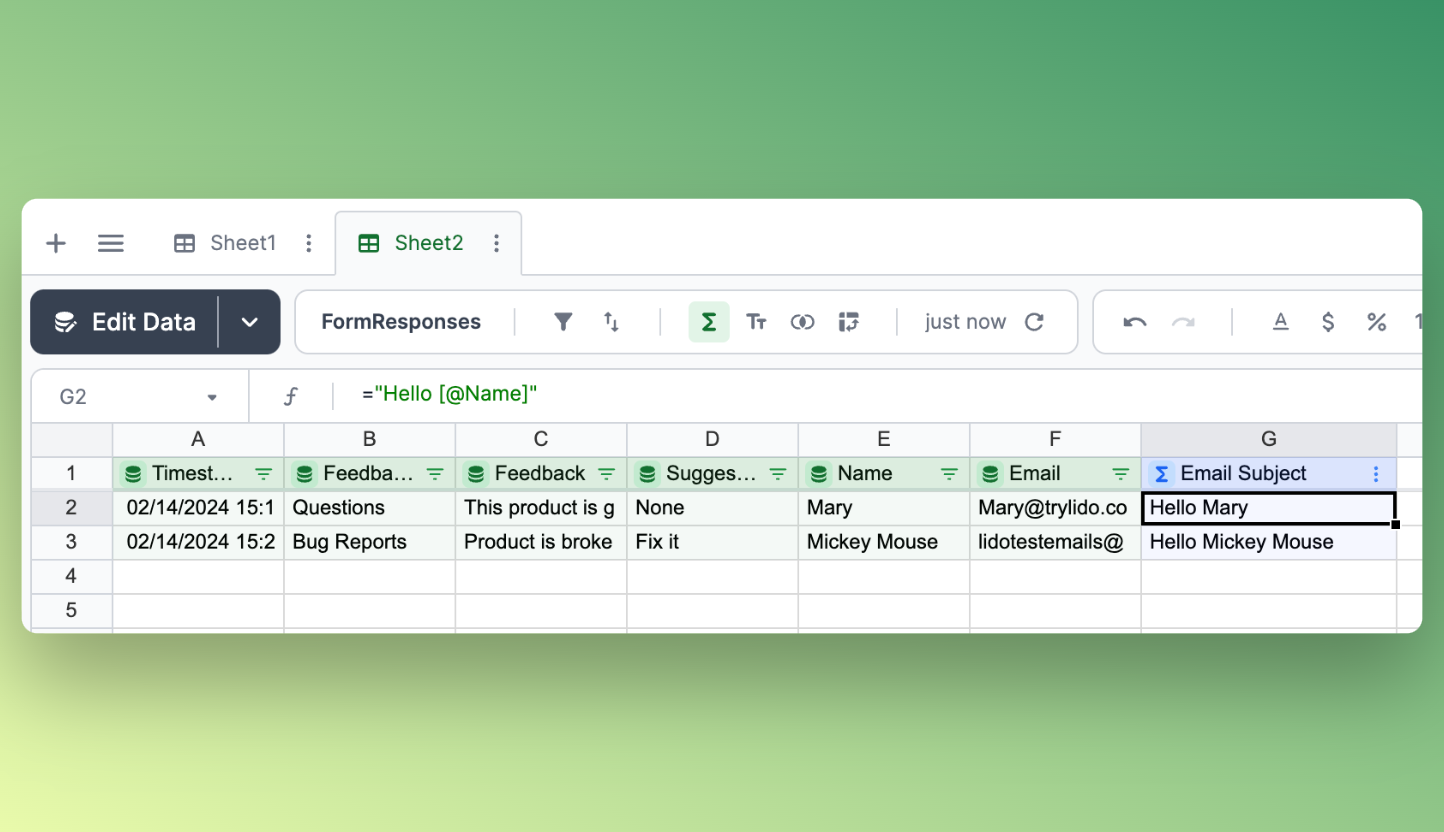
Repeat these steps for your email body. You should have two columns now, one for subject and one for body.
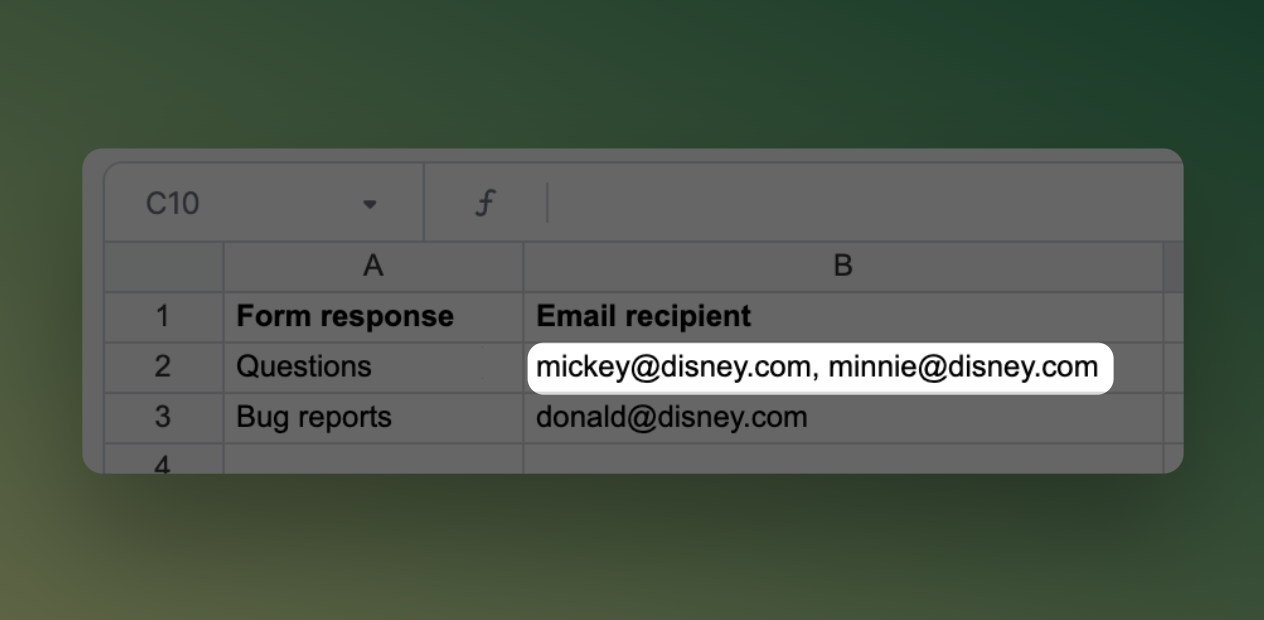
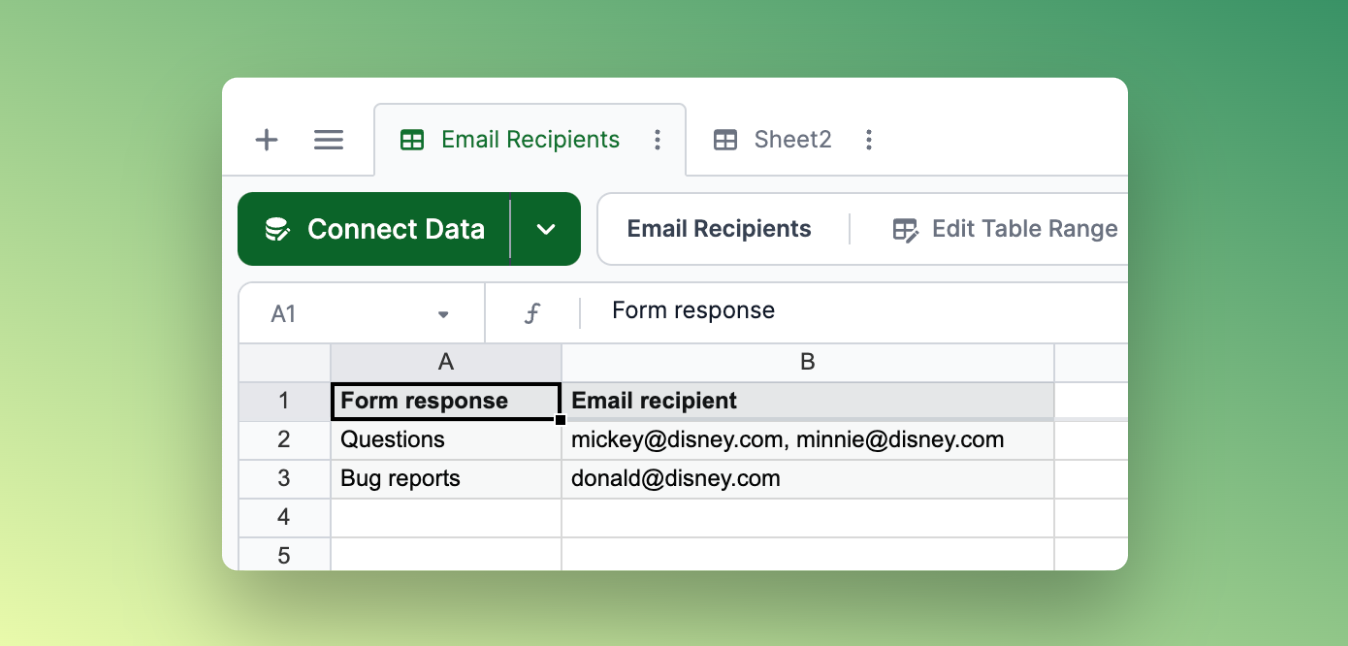
Now, we need to add the logic for who an email should be sent to based on a form response. To do this, we'll set up a simple matrix in our spreadsheet with Form response as one column and email recipient as the other. It's easiest to do this in a new tab, to keep things separate from your connected data. This example has two options, but you can add as many as you want.

If you want to send an email to multiple recipients, then you can separate them with a comma like this.
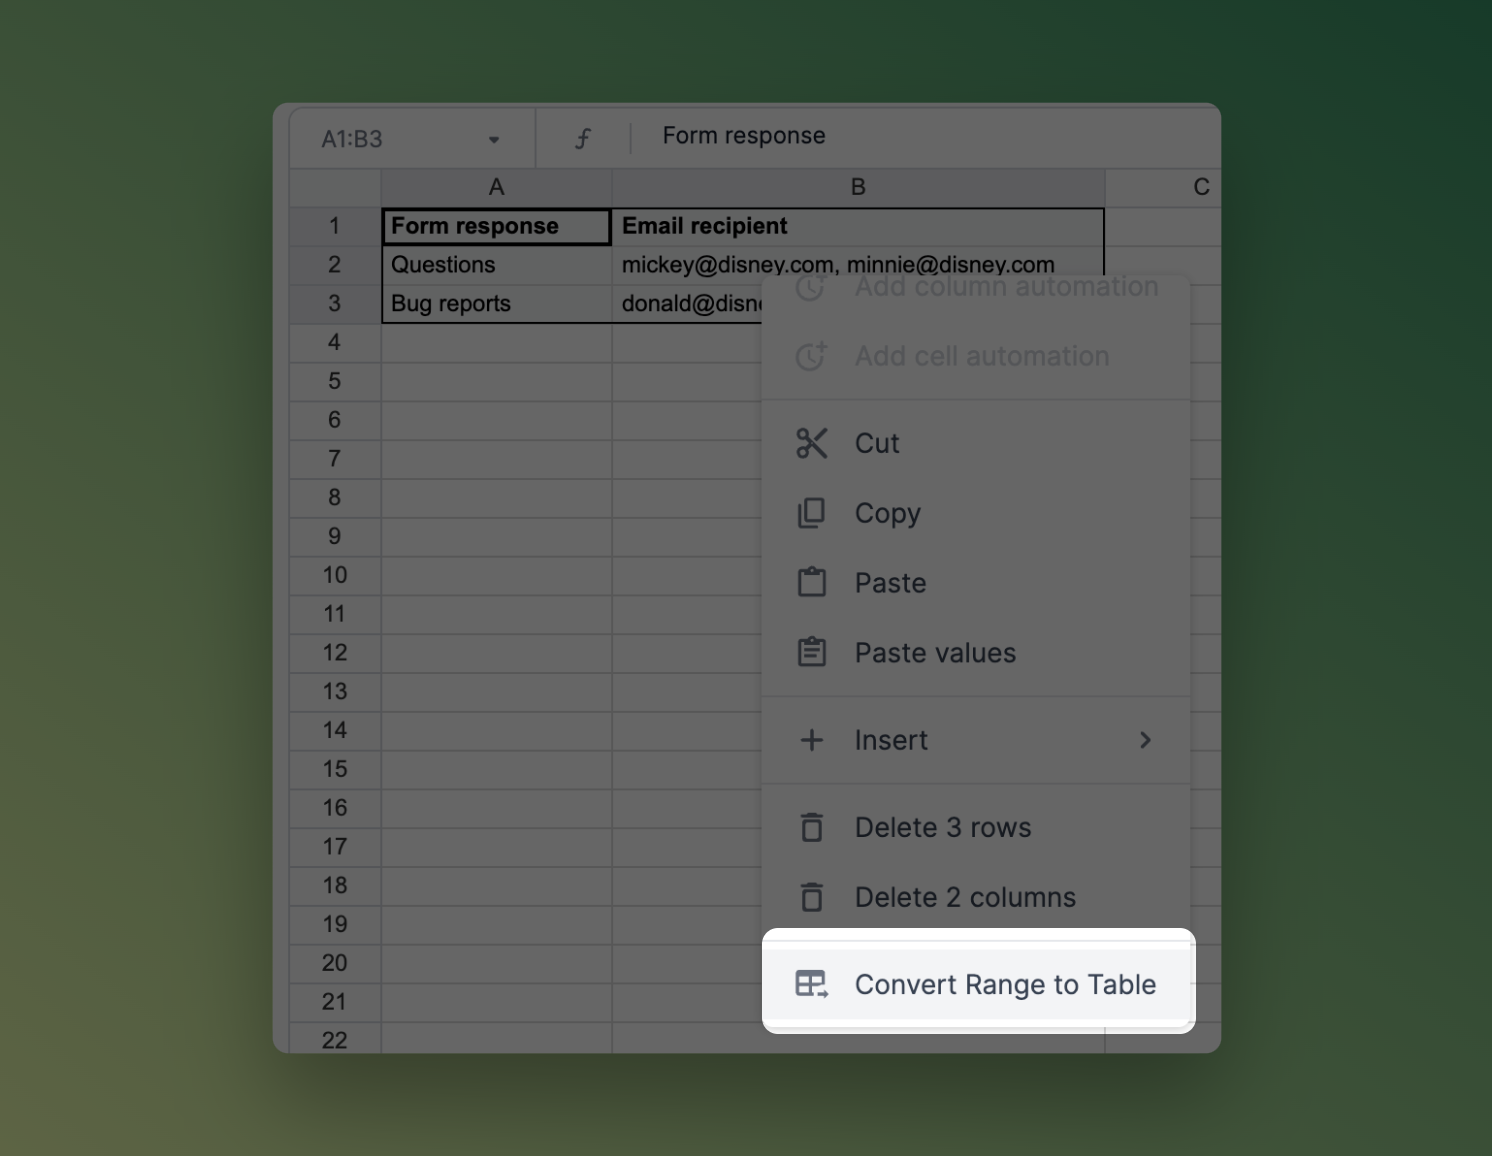
Finally, turn this entire matrix into a table. To do this, select the entire range in your spreadsheet. Then right click -> Convert Range to Table.
On the next screen, check the box for auto-expand rows. Then click Save.
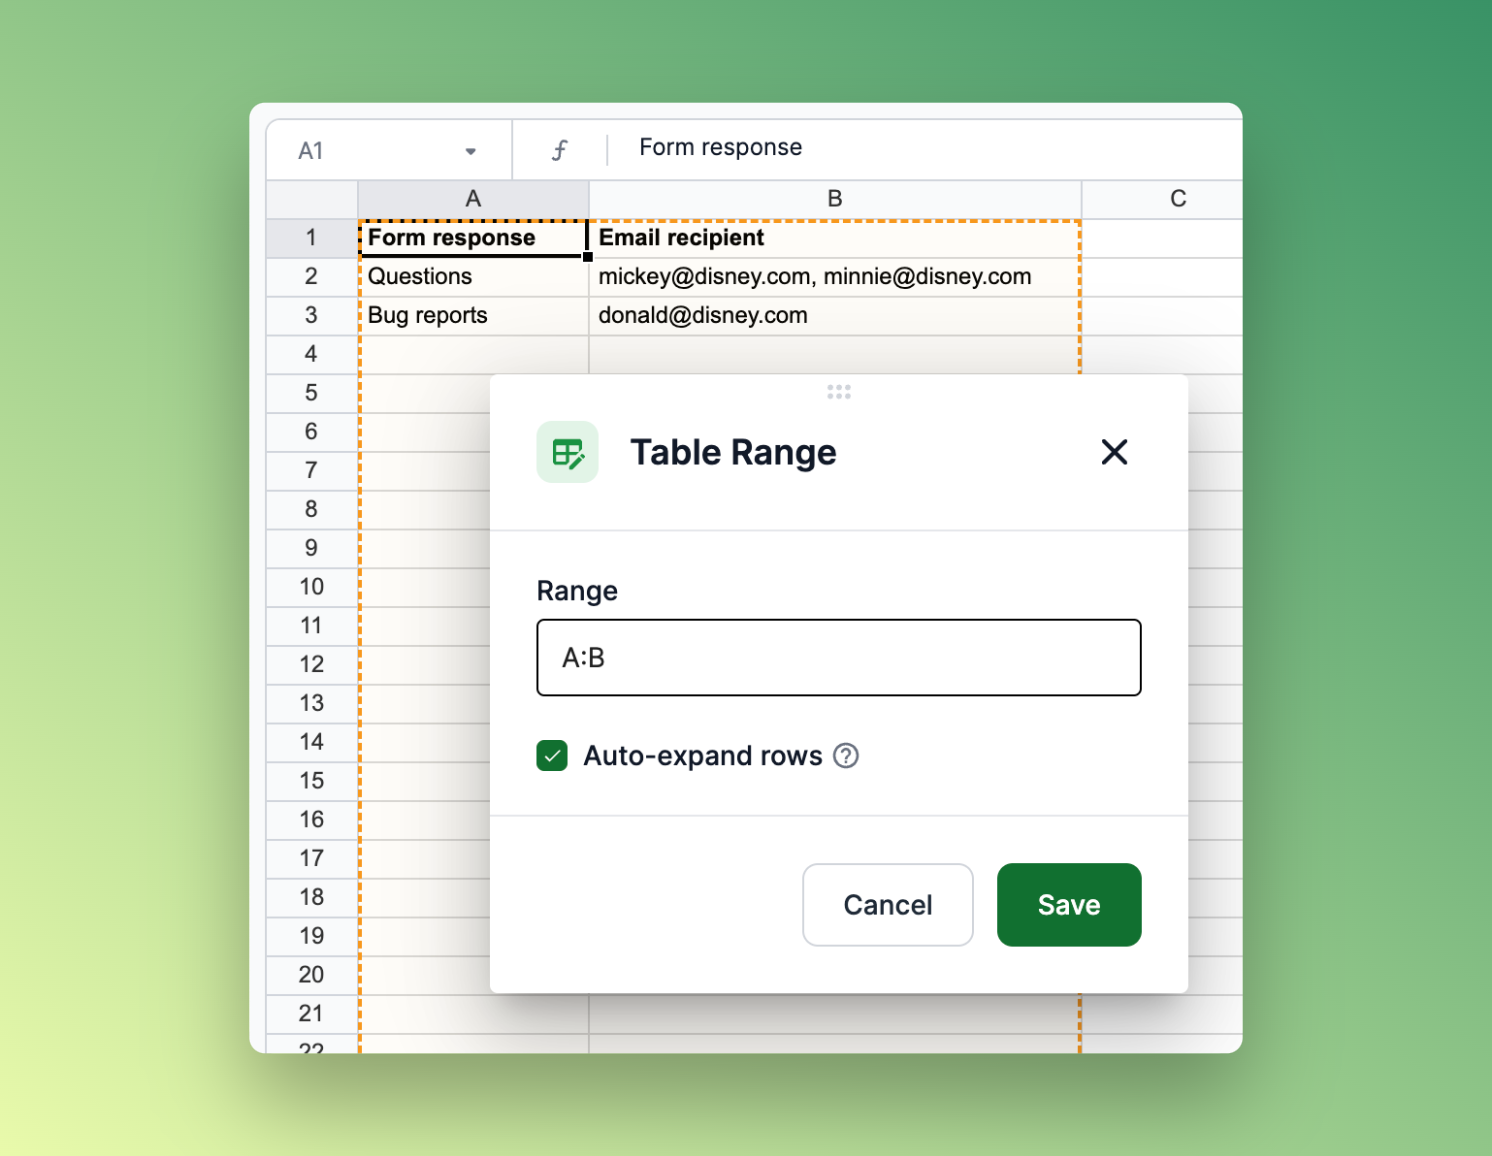
Give the table a name, like Email Recipients, then click save. You should now have a gray table in your spreadsheet.
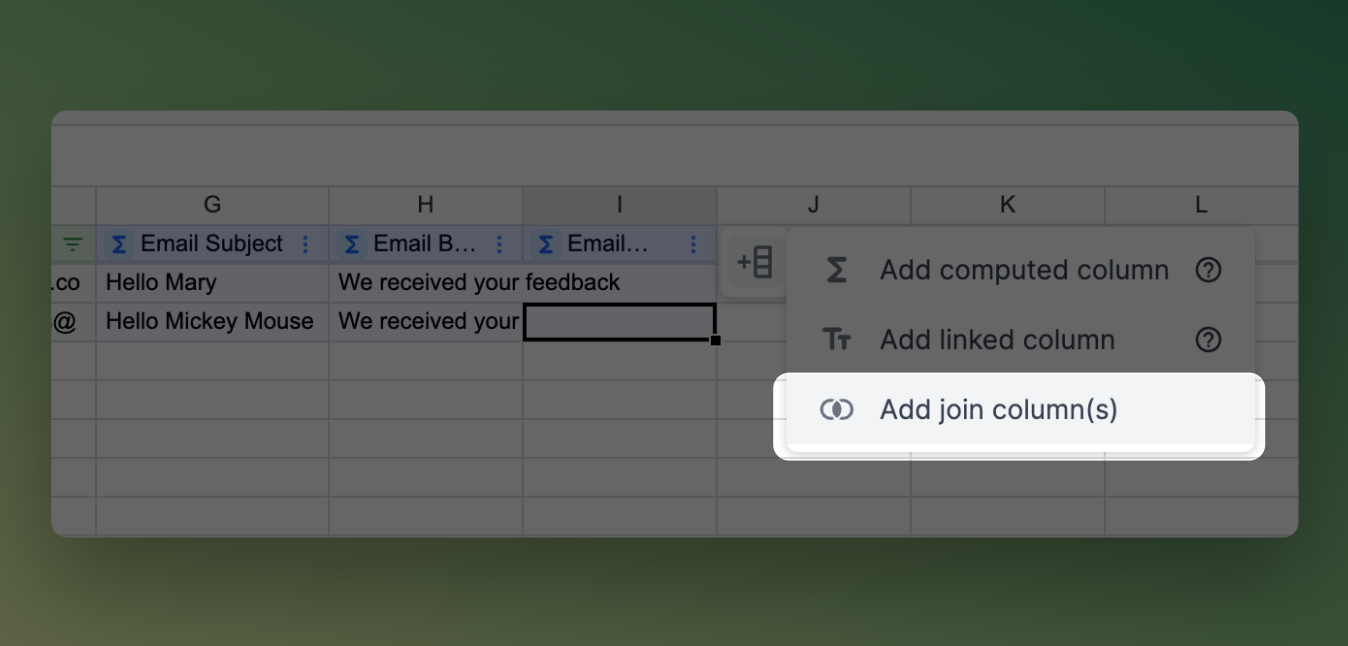
Now that we have our Email Recipients table, switch back to the worksheet with your connected Google Form data. Add a join column.
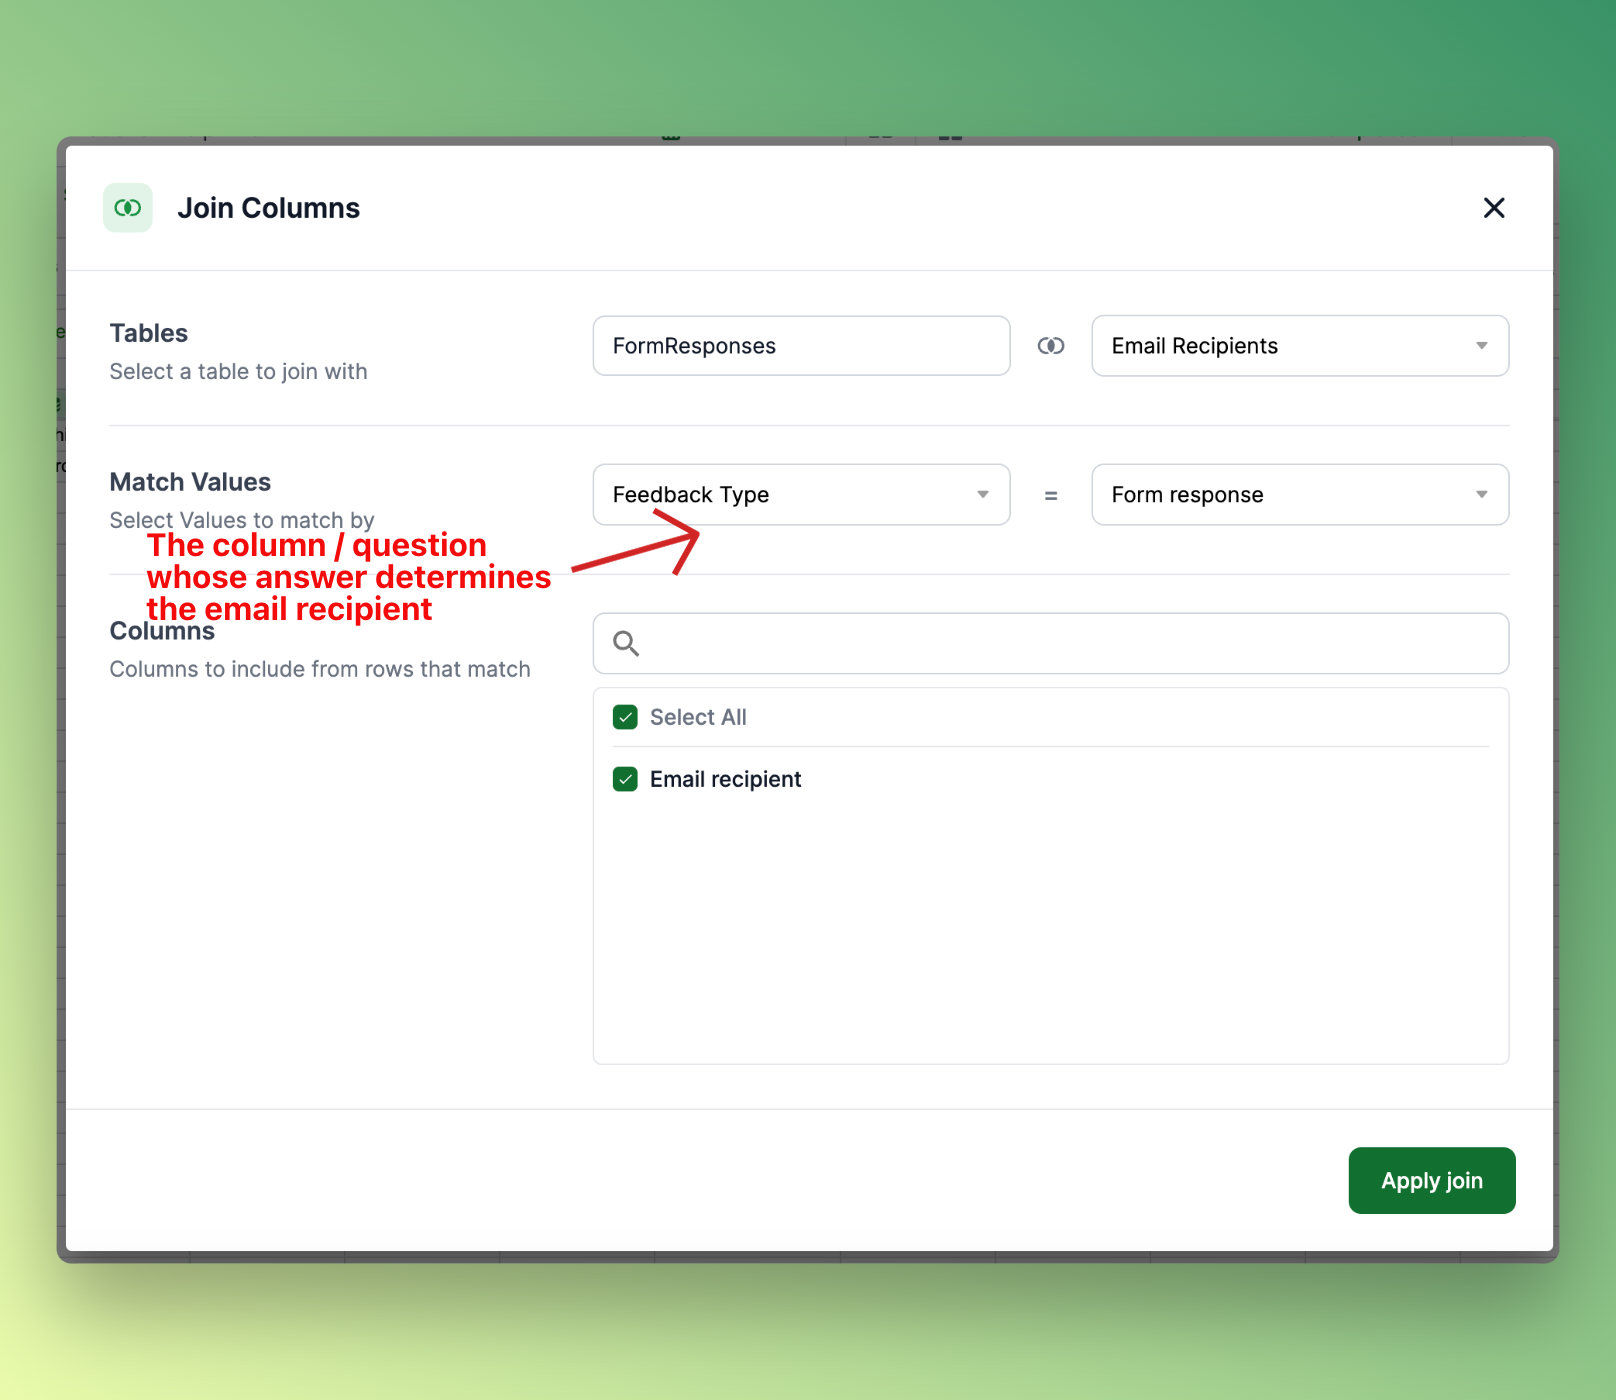
This will open the Join modal. In this modal, we want to link together our two tables: Form responses and Email recipients. We'll connect these using the "trigger" column whose responses will determine where emails get sent.
In this example, my "trigger" column in my Google Form is Feedback Type. The answer to this question in the Google Form will be used to determine where an email gets sent. I'm matching it to the values in the "Form response" column in my newly created Email Recipients table, since these two columns should contain the same values.
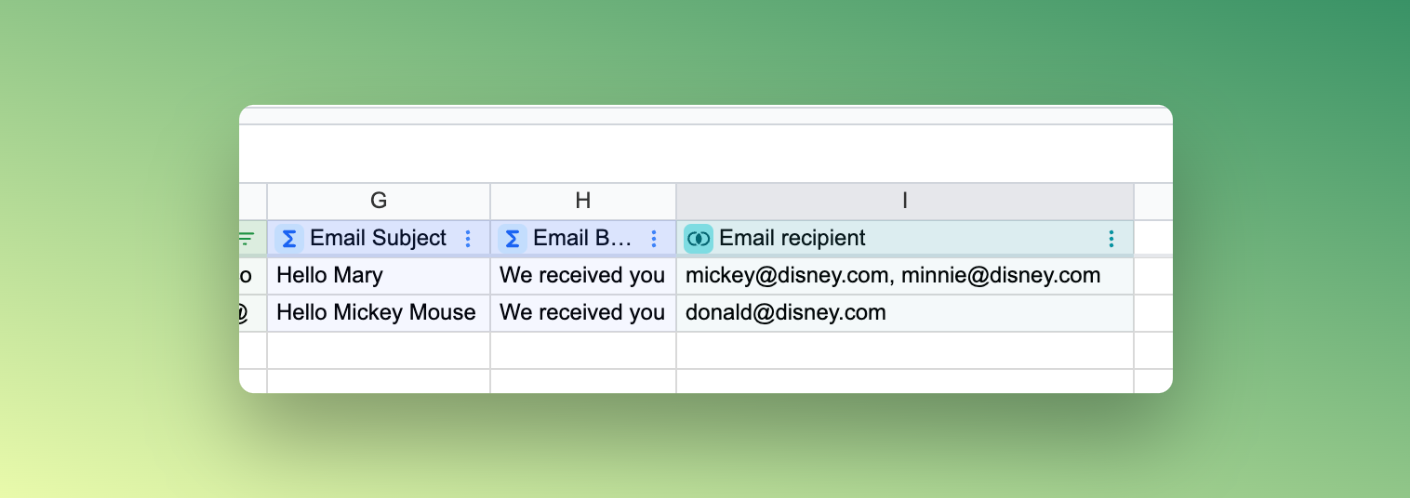
After you have this set up properly, click Apply Join. You'll now have a column for Email recipient that is dynamically calculated depending on the values in your trigger column.
^^^
info
Double check your spelling and capitalization
The values in the matched columns between each table must match exactly. If you get a message for "no match found" then double check that your capitalization and spelling all match exactly between your two table columns.
^^^
Now we are ready to add the formula to send out emails. Lido has a proprietary action formula called SENDGMAIL() which takes in data from the spreadsheet and sends an email when triggered.
Note: if you use Outlook instead of email, you can substitute =SENDOUTLOOK() everywhere you see =SENDGMAIL() and it will work exactly the same.
The syntax for SENDGMAIL is:
=SENDGMAIL(<sender-credential>, recipient, subject, body, status)
Here's what each of these components means:
sender-credential: this is the account that emails will be sent from. You'll need to authenticate into a Gmail or Google Apps account the first time you set this formula up.
recipient: the email address that the email is being sent to
subject: the email subject
body: the email body
status: the location of a spreadsheet cell that will get the output of whether the email was sent (either "success" or an error message)
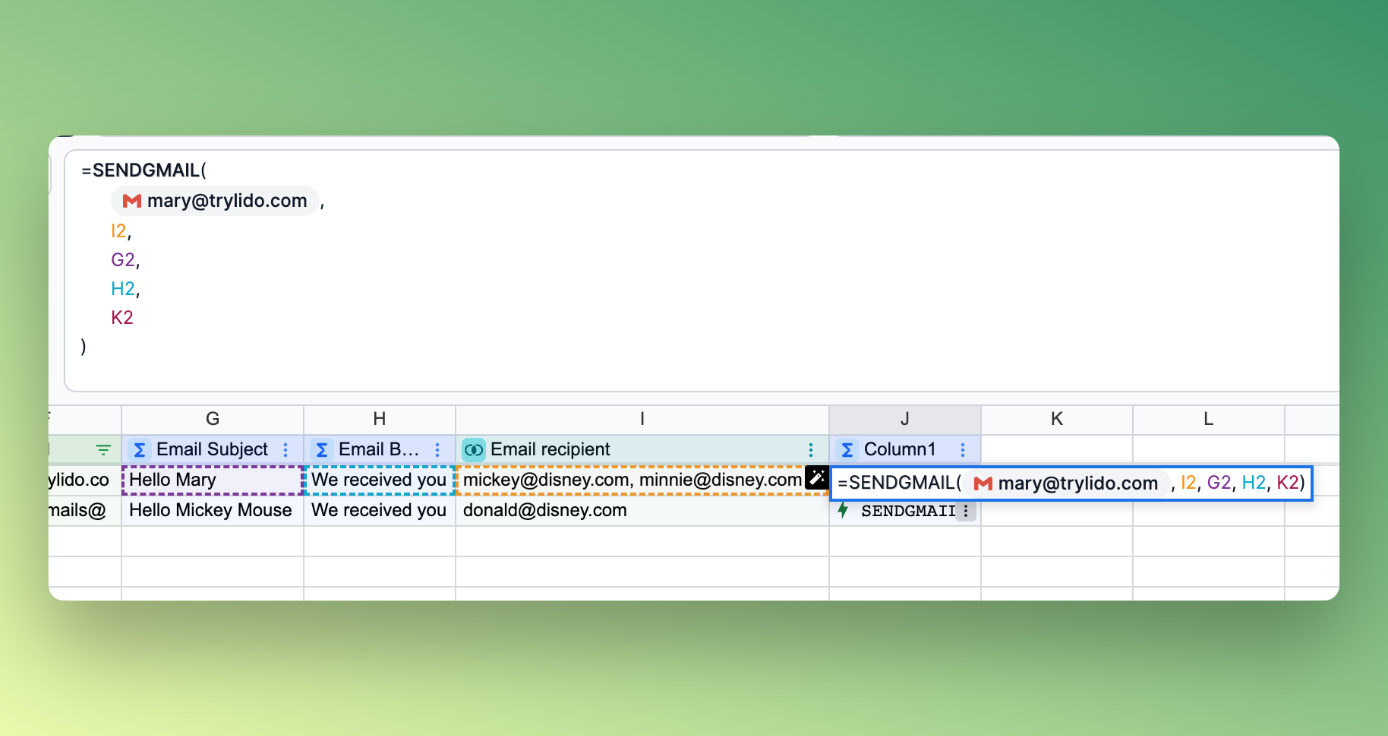
In our example, the formula in row 2 is:
```=SENDGMAIL(<sender-credential>, I2, G2, H2, J2)```
Importantly, the recipient input (I2 in the example) needs to reference the location of the Email recipient column that we added in the previous step. This is how the emails are sent to different people based on different responses.
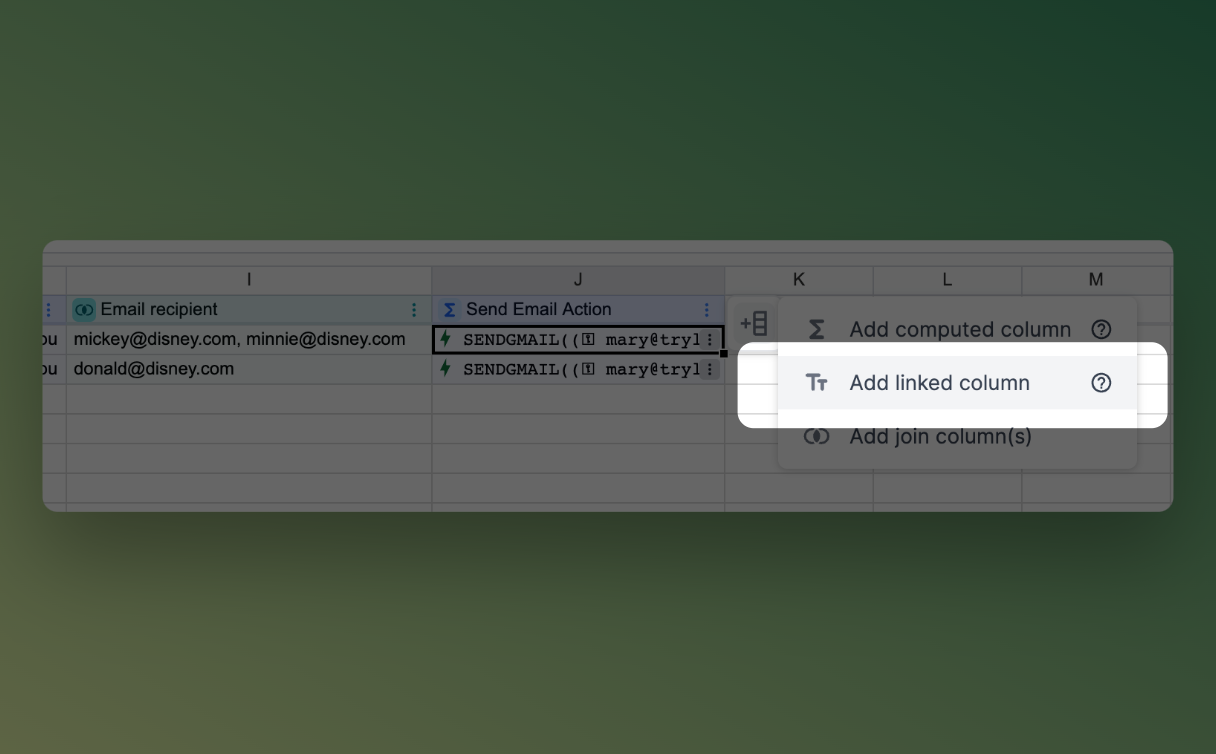
Next, add a Linked Column to hold the returned statuses of our SENDGMAIL actions. Make sure that the location of the Linked Column lines up with the status cell location in your SENDGMAIL formula (column K in this example).
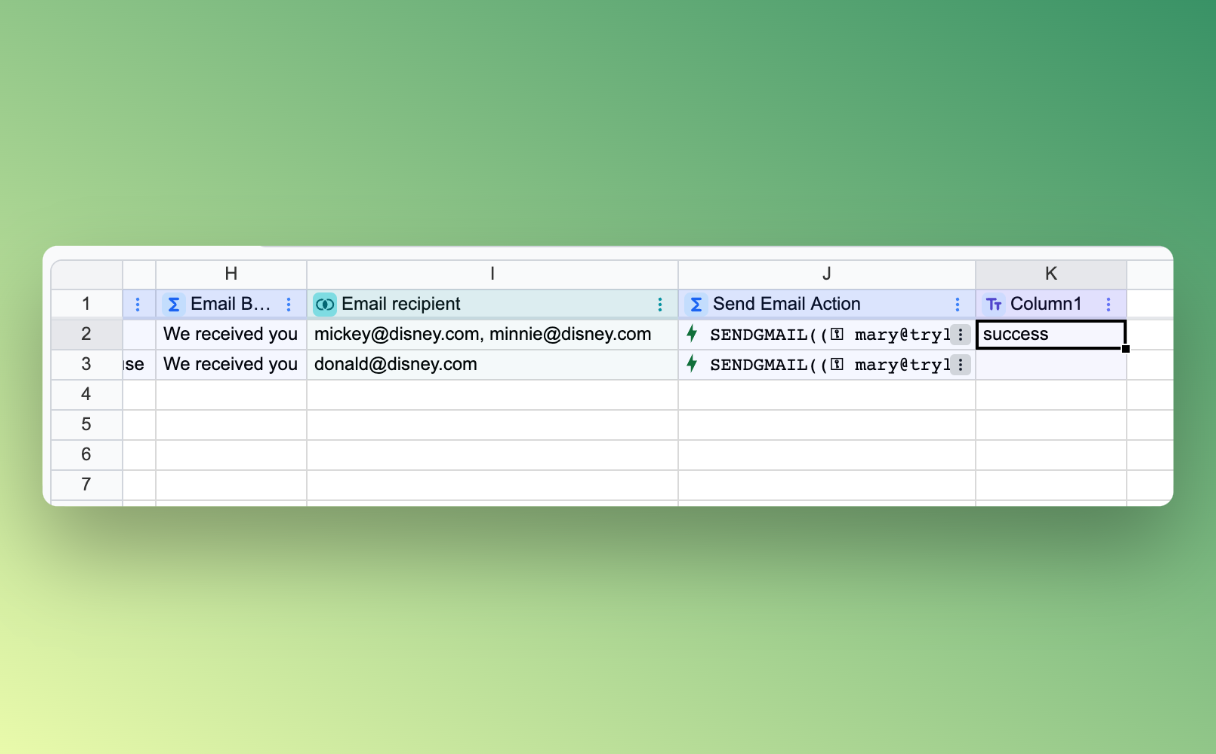
Now we are ready to test our column. To send out a test email you can click the 3 dot menu in a SENDGMAIL cell and click Run action. This will actually send out an email.

After an email has been successfully sent, you'll see "success" displayed in the status linked column in column K.
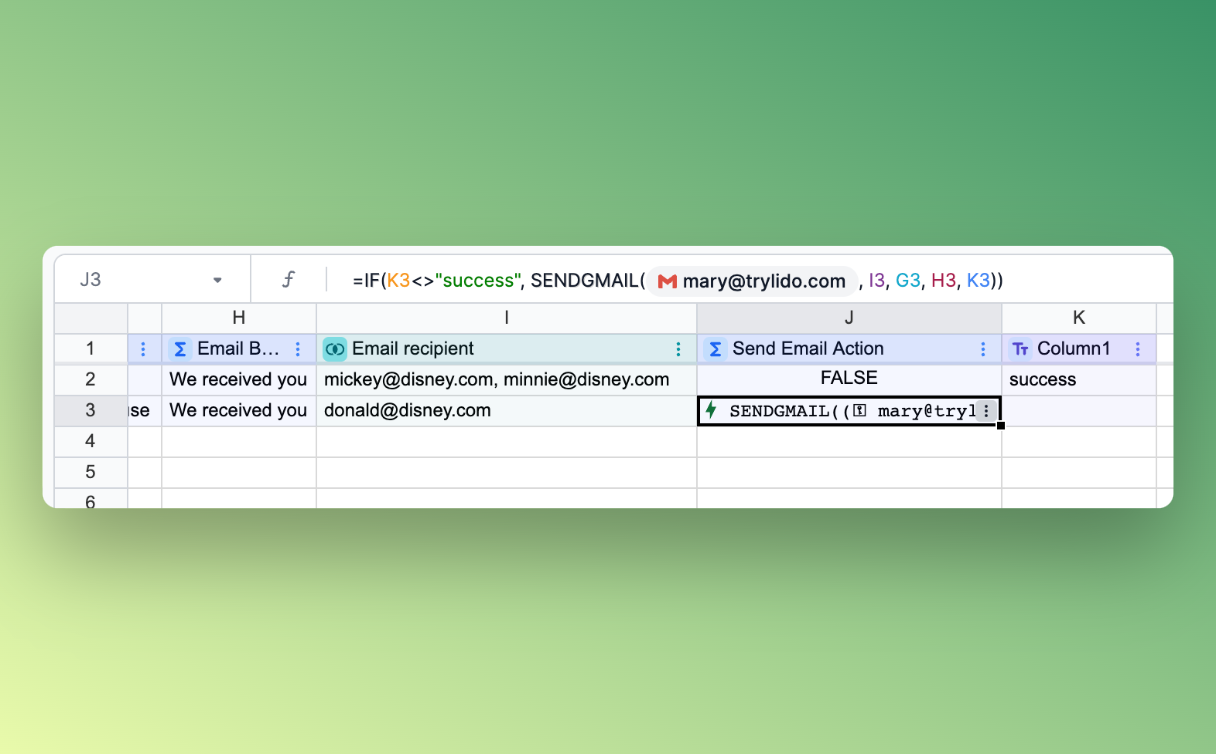
Since we only want our emails to go out once, we need to wrap this entire thing in an IF statement that checks whether an email has already been sent.
```=IF(K2<>"success", SENDGMAIL(<sender-credential>, I2, G2, H2, J2) )```
This formula says check the status column to see if there is a success message. If there is not, then display the SENDGMAIL formula. If there is, then display FALSE.
As you can see, after an email has been sent for the row, there is no longer a SENDGMAIL formula in that row.
Finally, we are ready to create an automation. Lido automations will fetch the latest data then run all of the actions displayed in the automated column. This is why it was important to add the IF statement in the previous step, otherwise you'd get a new email every time the automation runs regardless of whether one has already been sent.
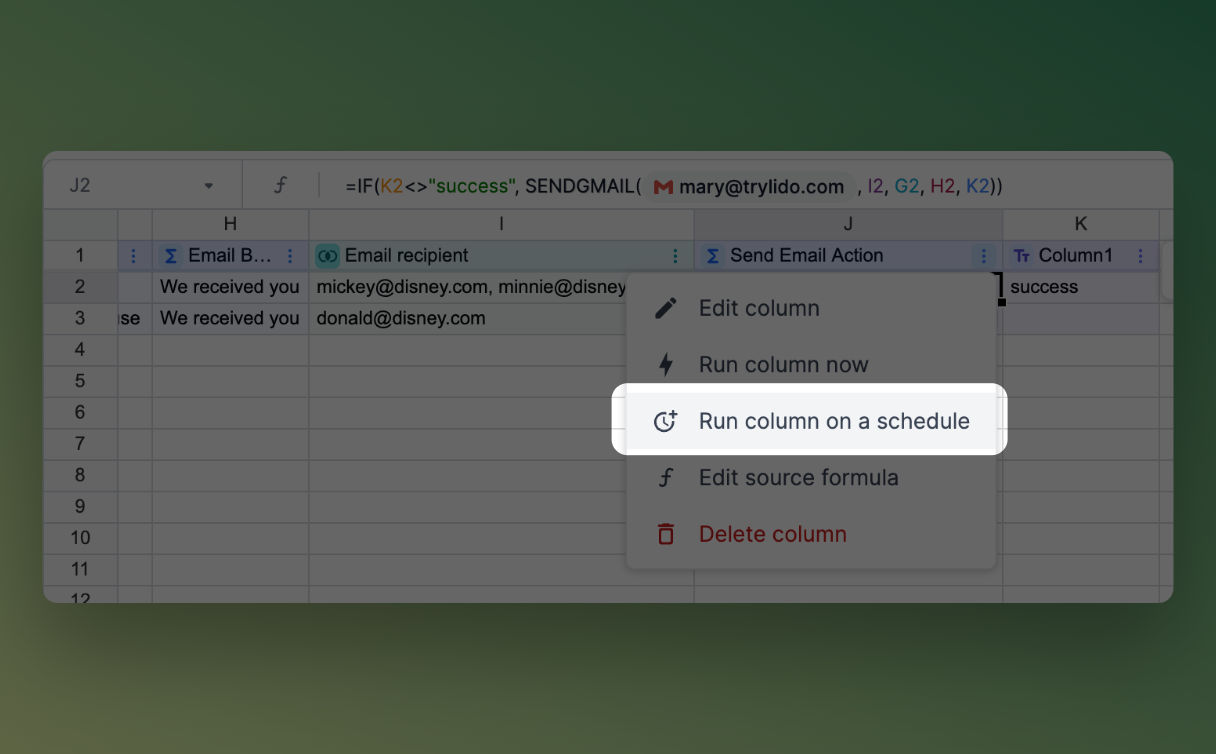
In the column that contains your SENDGMAIL formulas, go to the header cell and click on the 3 dot menu. Click on Run Column on a Schedule.
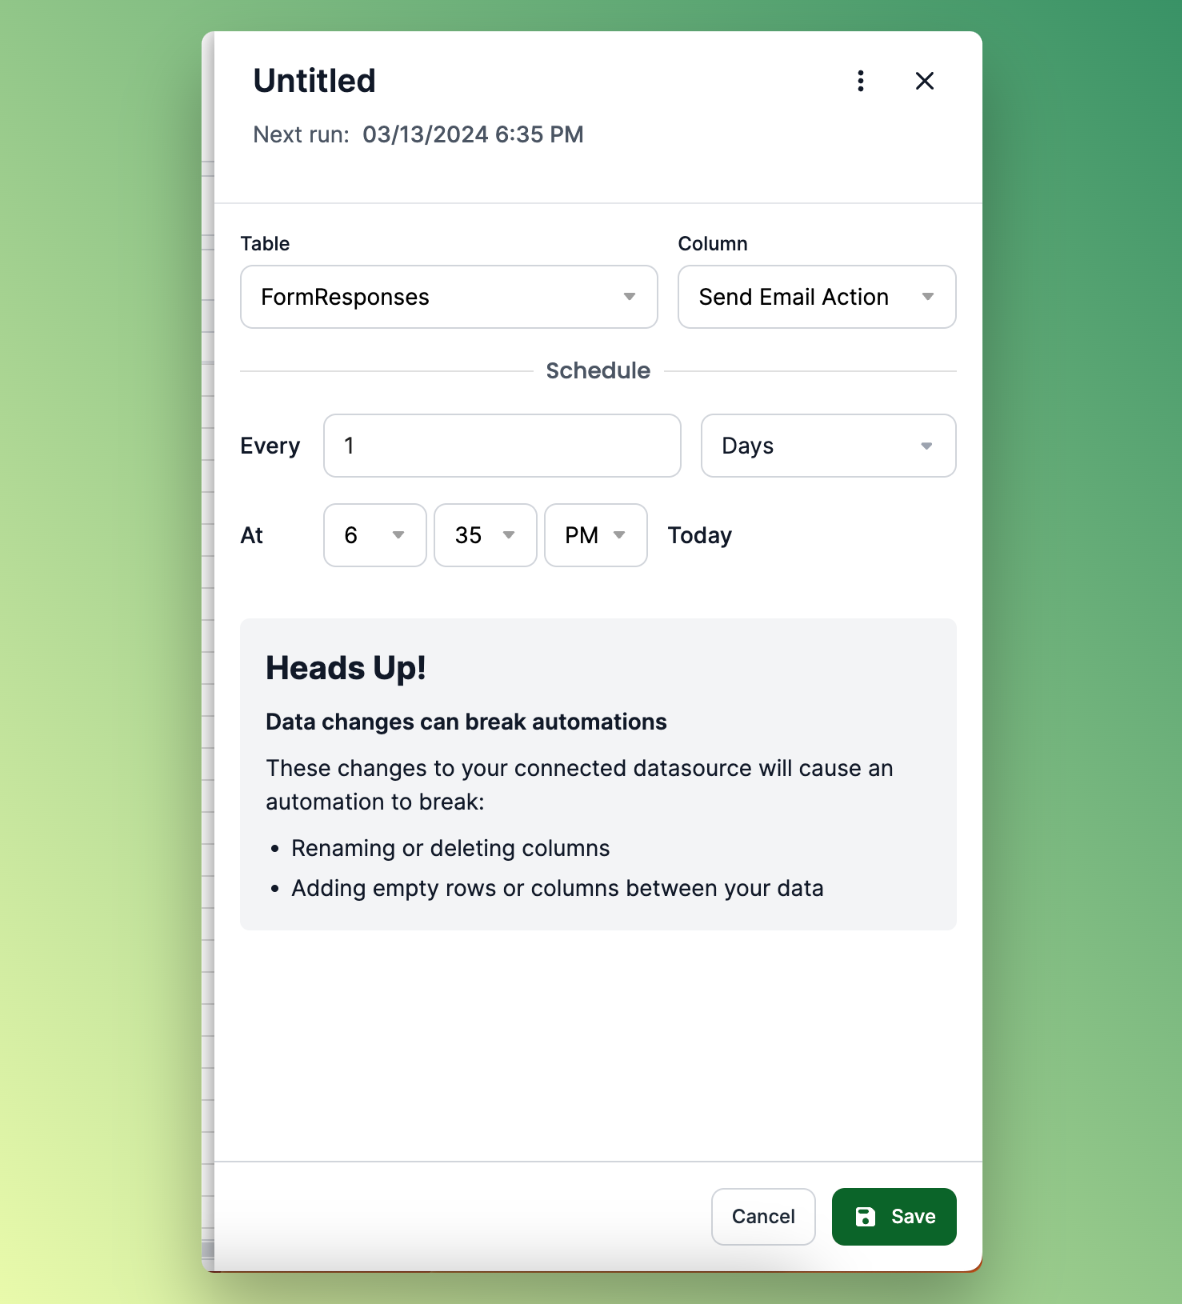
This will open the automation panel. Here, you can select a frequency for how often to check for updates. Then click save.
Every time the automation interval passes, the following will happen:
1 - Lido will pull in the latest data from Google Forms and Sheets
2 - All of the rows with a SENDGMAIL() formula in the automated column will have the formula triggered
Your file does not need to be open for the automation to run, it will run silently in the background.